
Many guitarists feel that they could never afford ANY custom instrument, but can't find a factory model that works for them. SO, I offer "Parts-Casters", using mostly Fender inspired (and licensed) elements that can be combined in a vast number of variations of your choice.
Component choice and mods incorporated into the build will dictate final costs,but prices can generally be expected to range like mid level to high end "standard" corporate guitars.
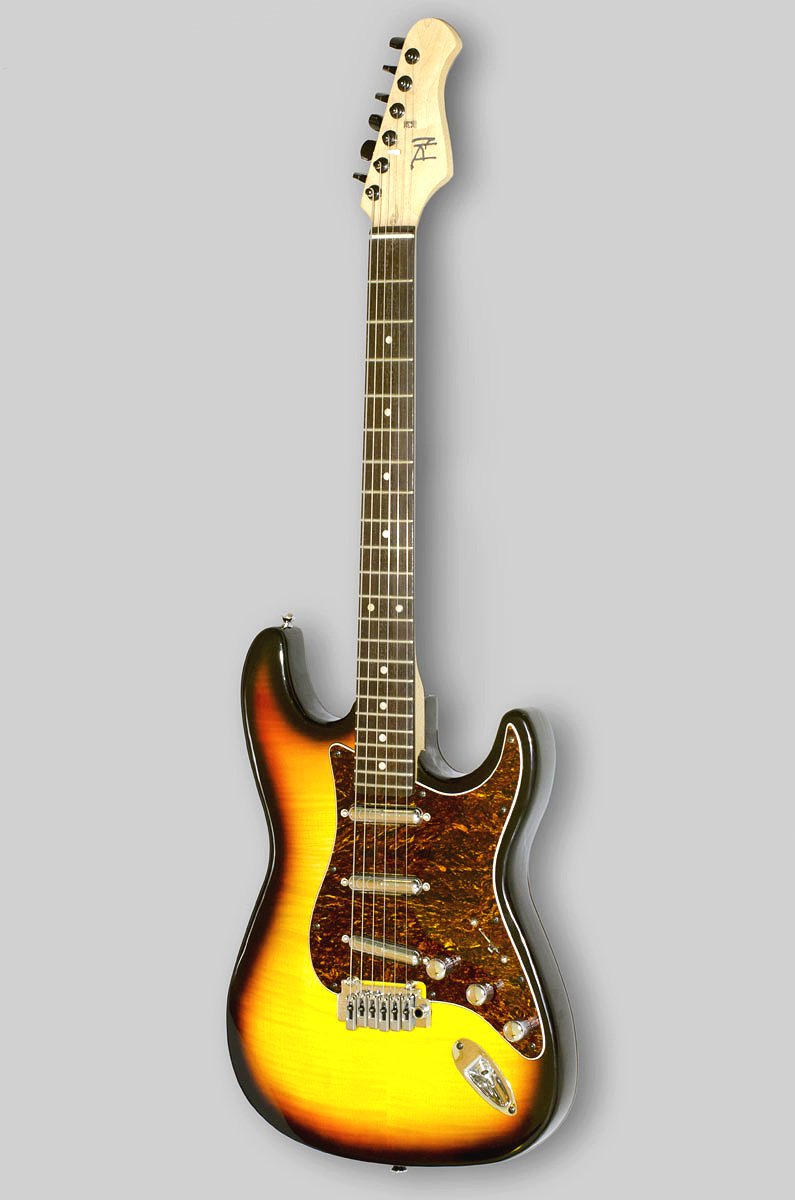
This example uses a light weight body with tobacco sunburst flame maple veneer, Gotoh locking tuners, GFS lipstick tube pickups wired with the David Gilmour mod to allow independent switching for the neck pickup, giving 8 tone selections instead of the standard 5. The Wilkinson modern tremolo has a removable block. NOT your typical S type instrument.
I use this guitar for open G (Keith Richards) tuning and slide work. I switched the pickups out for a Seymour Duncan Everything Axe set. With coil tapping wiring, for the neck and bridge pups, 9 tone options are available. As a premium set, this would , of course,result in a price increase
Sold but can be recreated. $900.00 with hardshell case
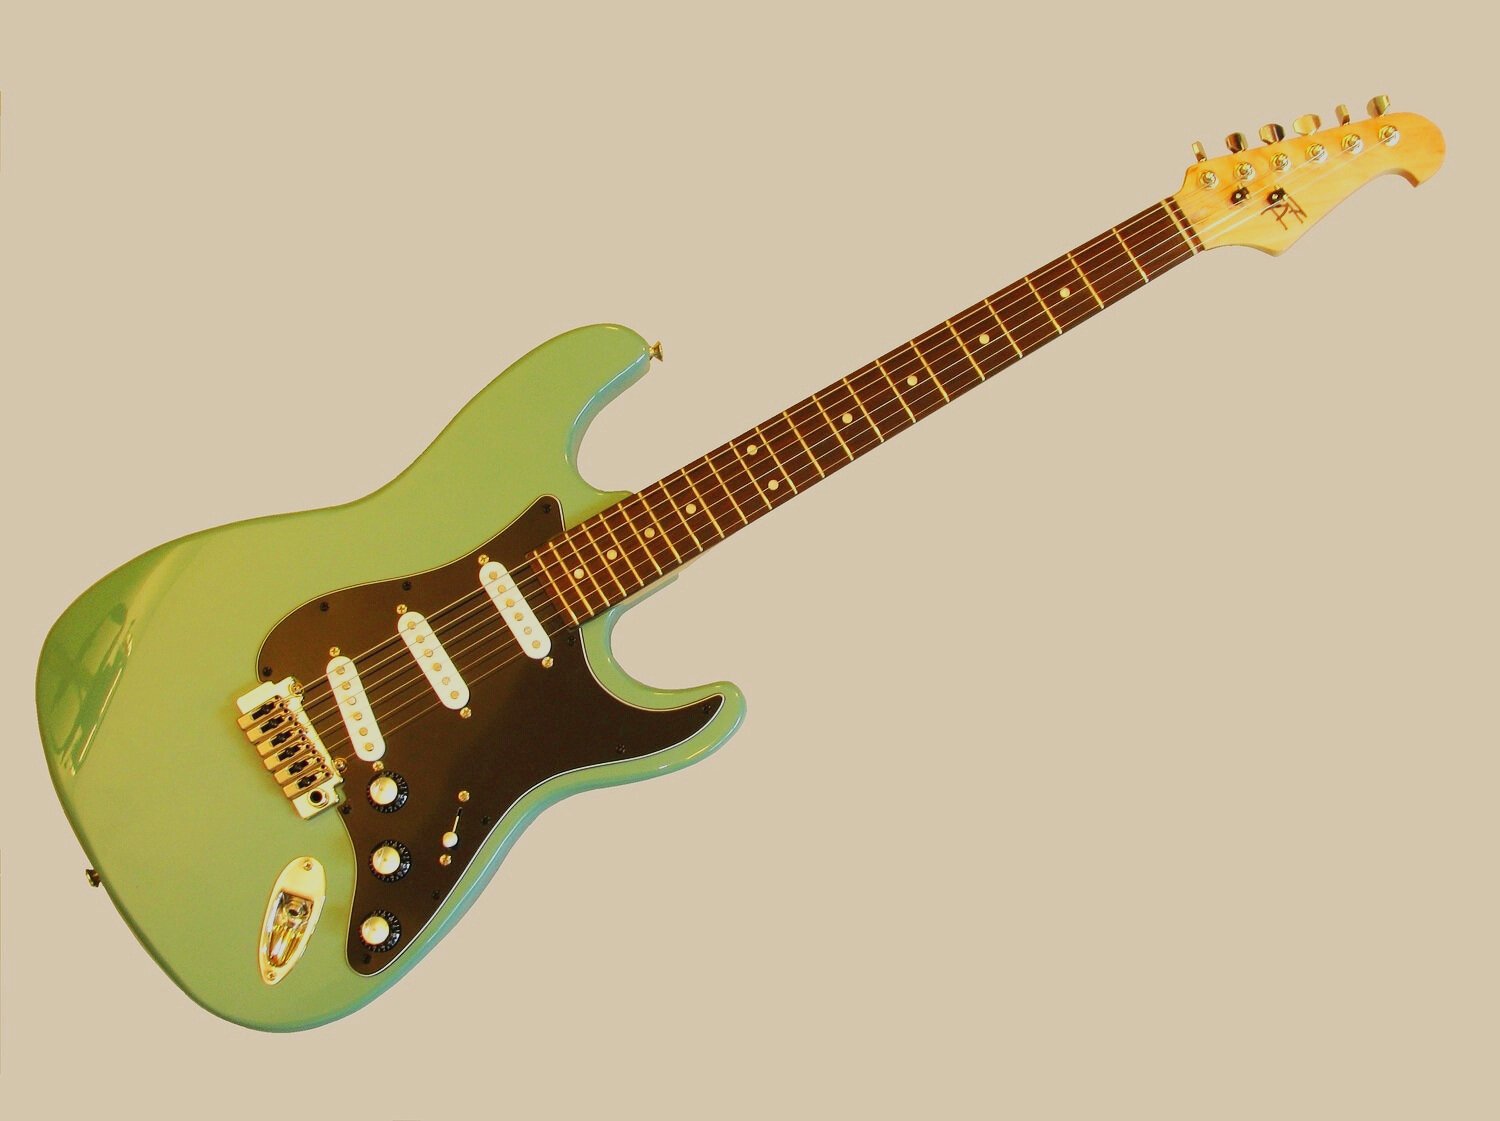
Another Parts Caster in a color from the 50s. Essentially a straight up recreation of one of Leo's best designs, this instrument has some less commonly offered component combinations. It is nearly impossible to find white pickups, black pickguard and rose wood neck with maple headstock on one instrument.
The pickups are Texas Wound, but the mid pick up tone knob can be switched between standard tone duty or to neck volume by pulling it out (the David Gilmour mod). This adds three more easily accessed sonic choices to the usual five. You can take this one from Dick Dale's big surf sound to Pink Floyd's Wall, and then to Stevie Ray Vaughan's smokin' blues with ease.
The Wilkinson two point tremolo bridge provides solid, reliable return to tuning in addition to being smooth under your palm during muted playing.
All in all, an elegant guitar for under a grand.
SOLD
$800.00 with hardshell case
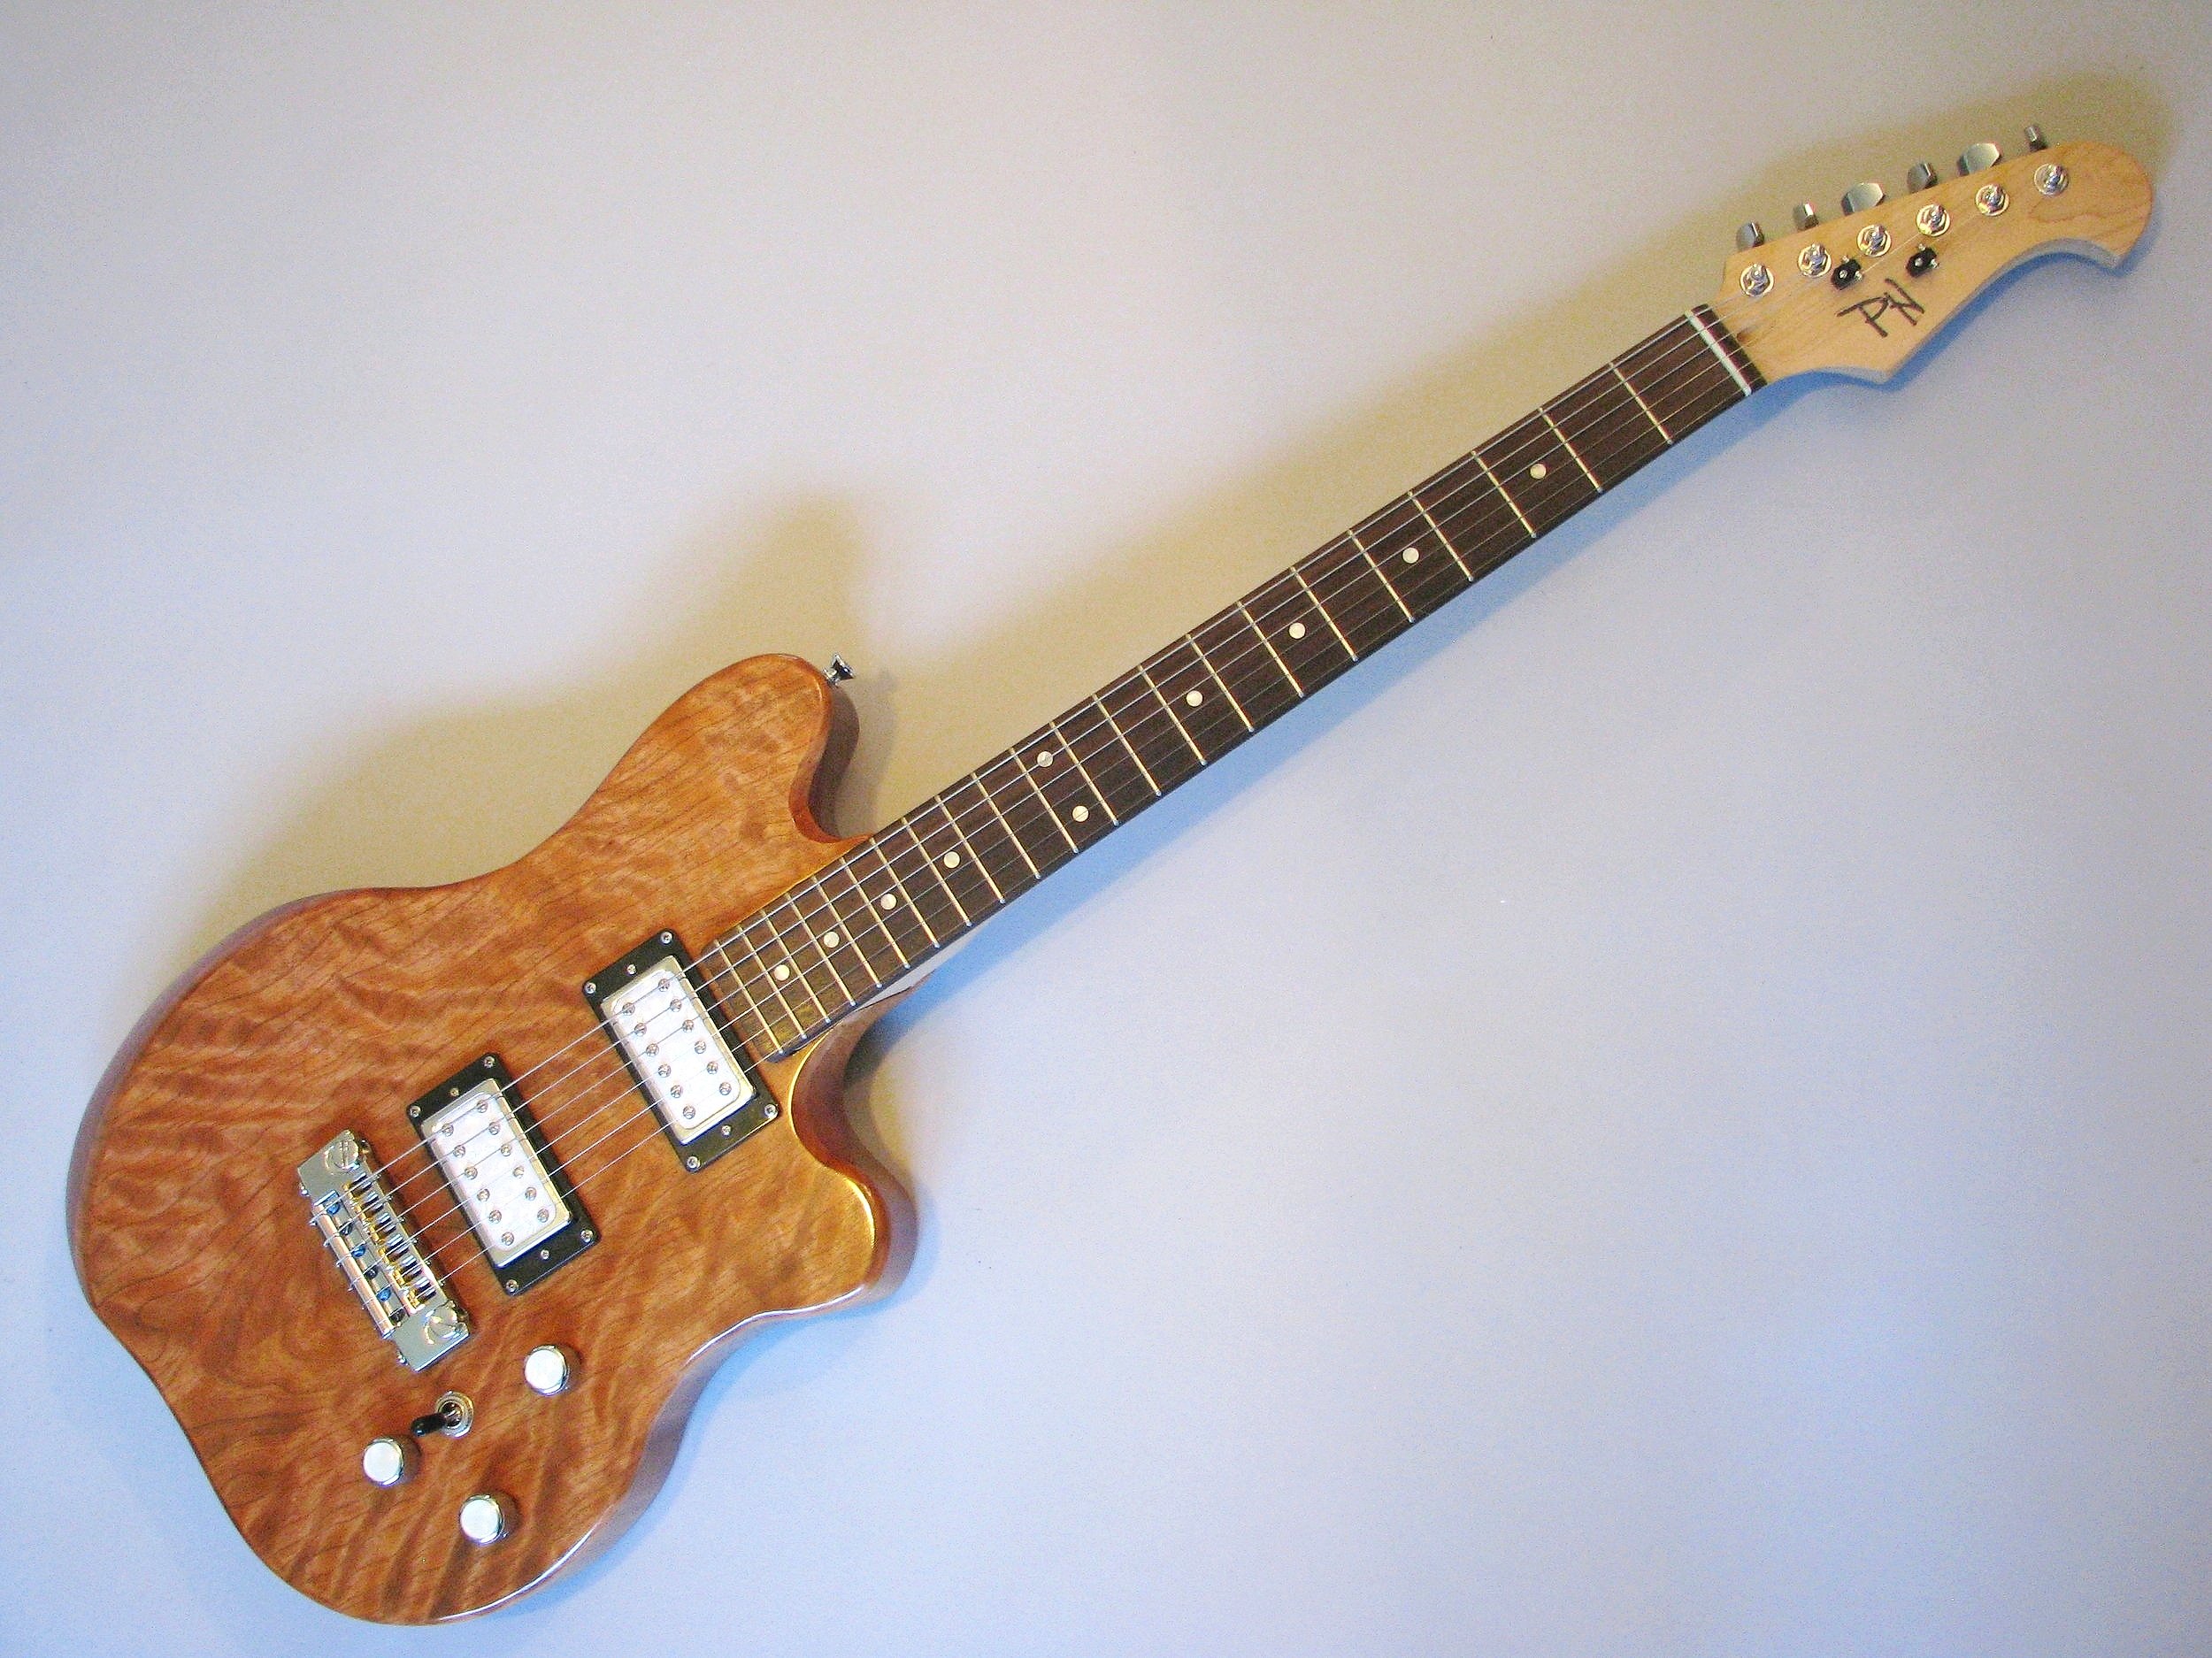
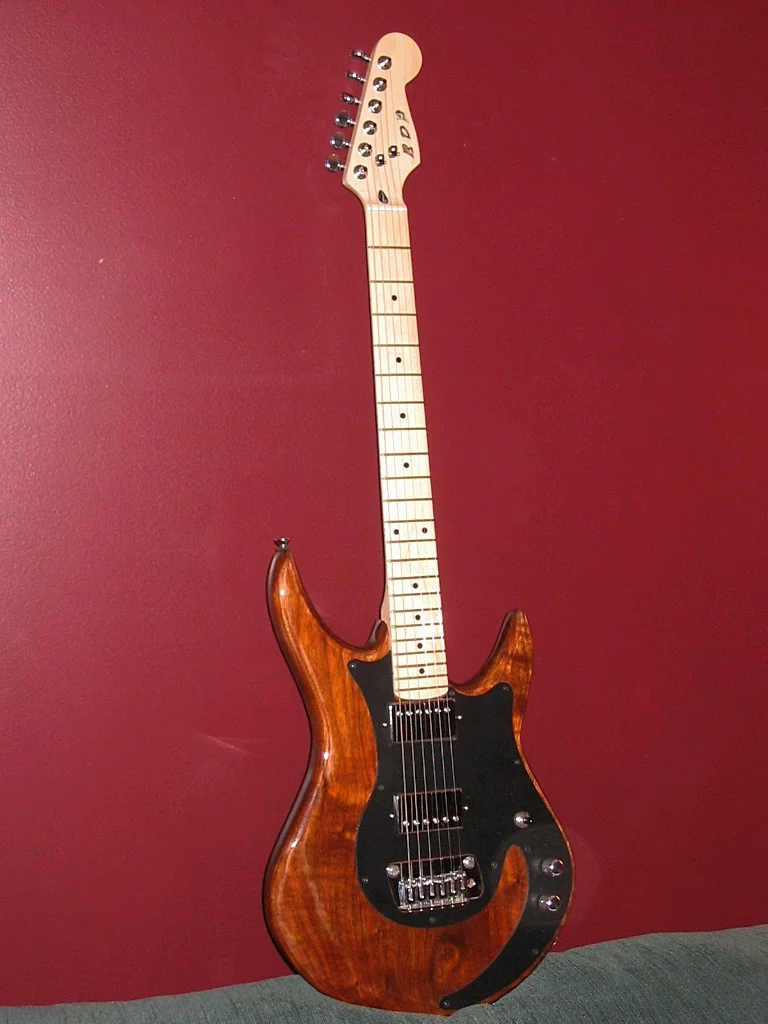
Finally Finished! The 25 1/2" scale neck is a licensed part, the pickups are 2x P-90s that split. VERY meaty and rich with 2 volumes and a master tone circuit. Lots of tone variation here! The bridge is a locking wrap around that offers excellent adjustments.
HOWEVER....The previous body was the prototype body for testing my ideas about chambering and layering techniques. It all worked, but like Waterford Crystal...I'm not offering factory seconds. I've created a new body of mahogany and curly cherry equal to the rest of my instruments.
I've also taken another step in my chambering process. The bridge and neck blocks are still integral to the core frame, however, I've routed away the spine between them to allow the top and back plates to move more. The result is a round and rich, woody tone without feedback and the appearance of a solid body guitar. Take a look at the next photo to see the visual of the core as it relates to the top and back plates.
SOLD With case: $1300.00
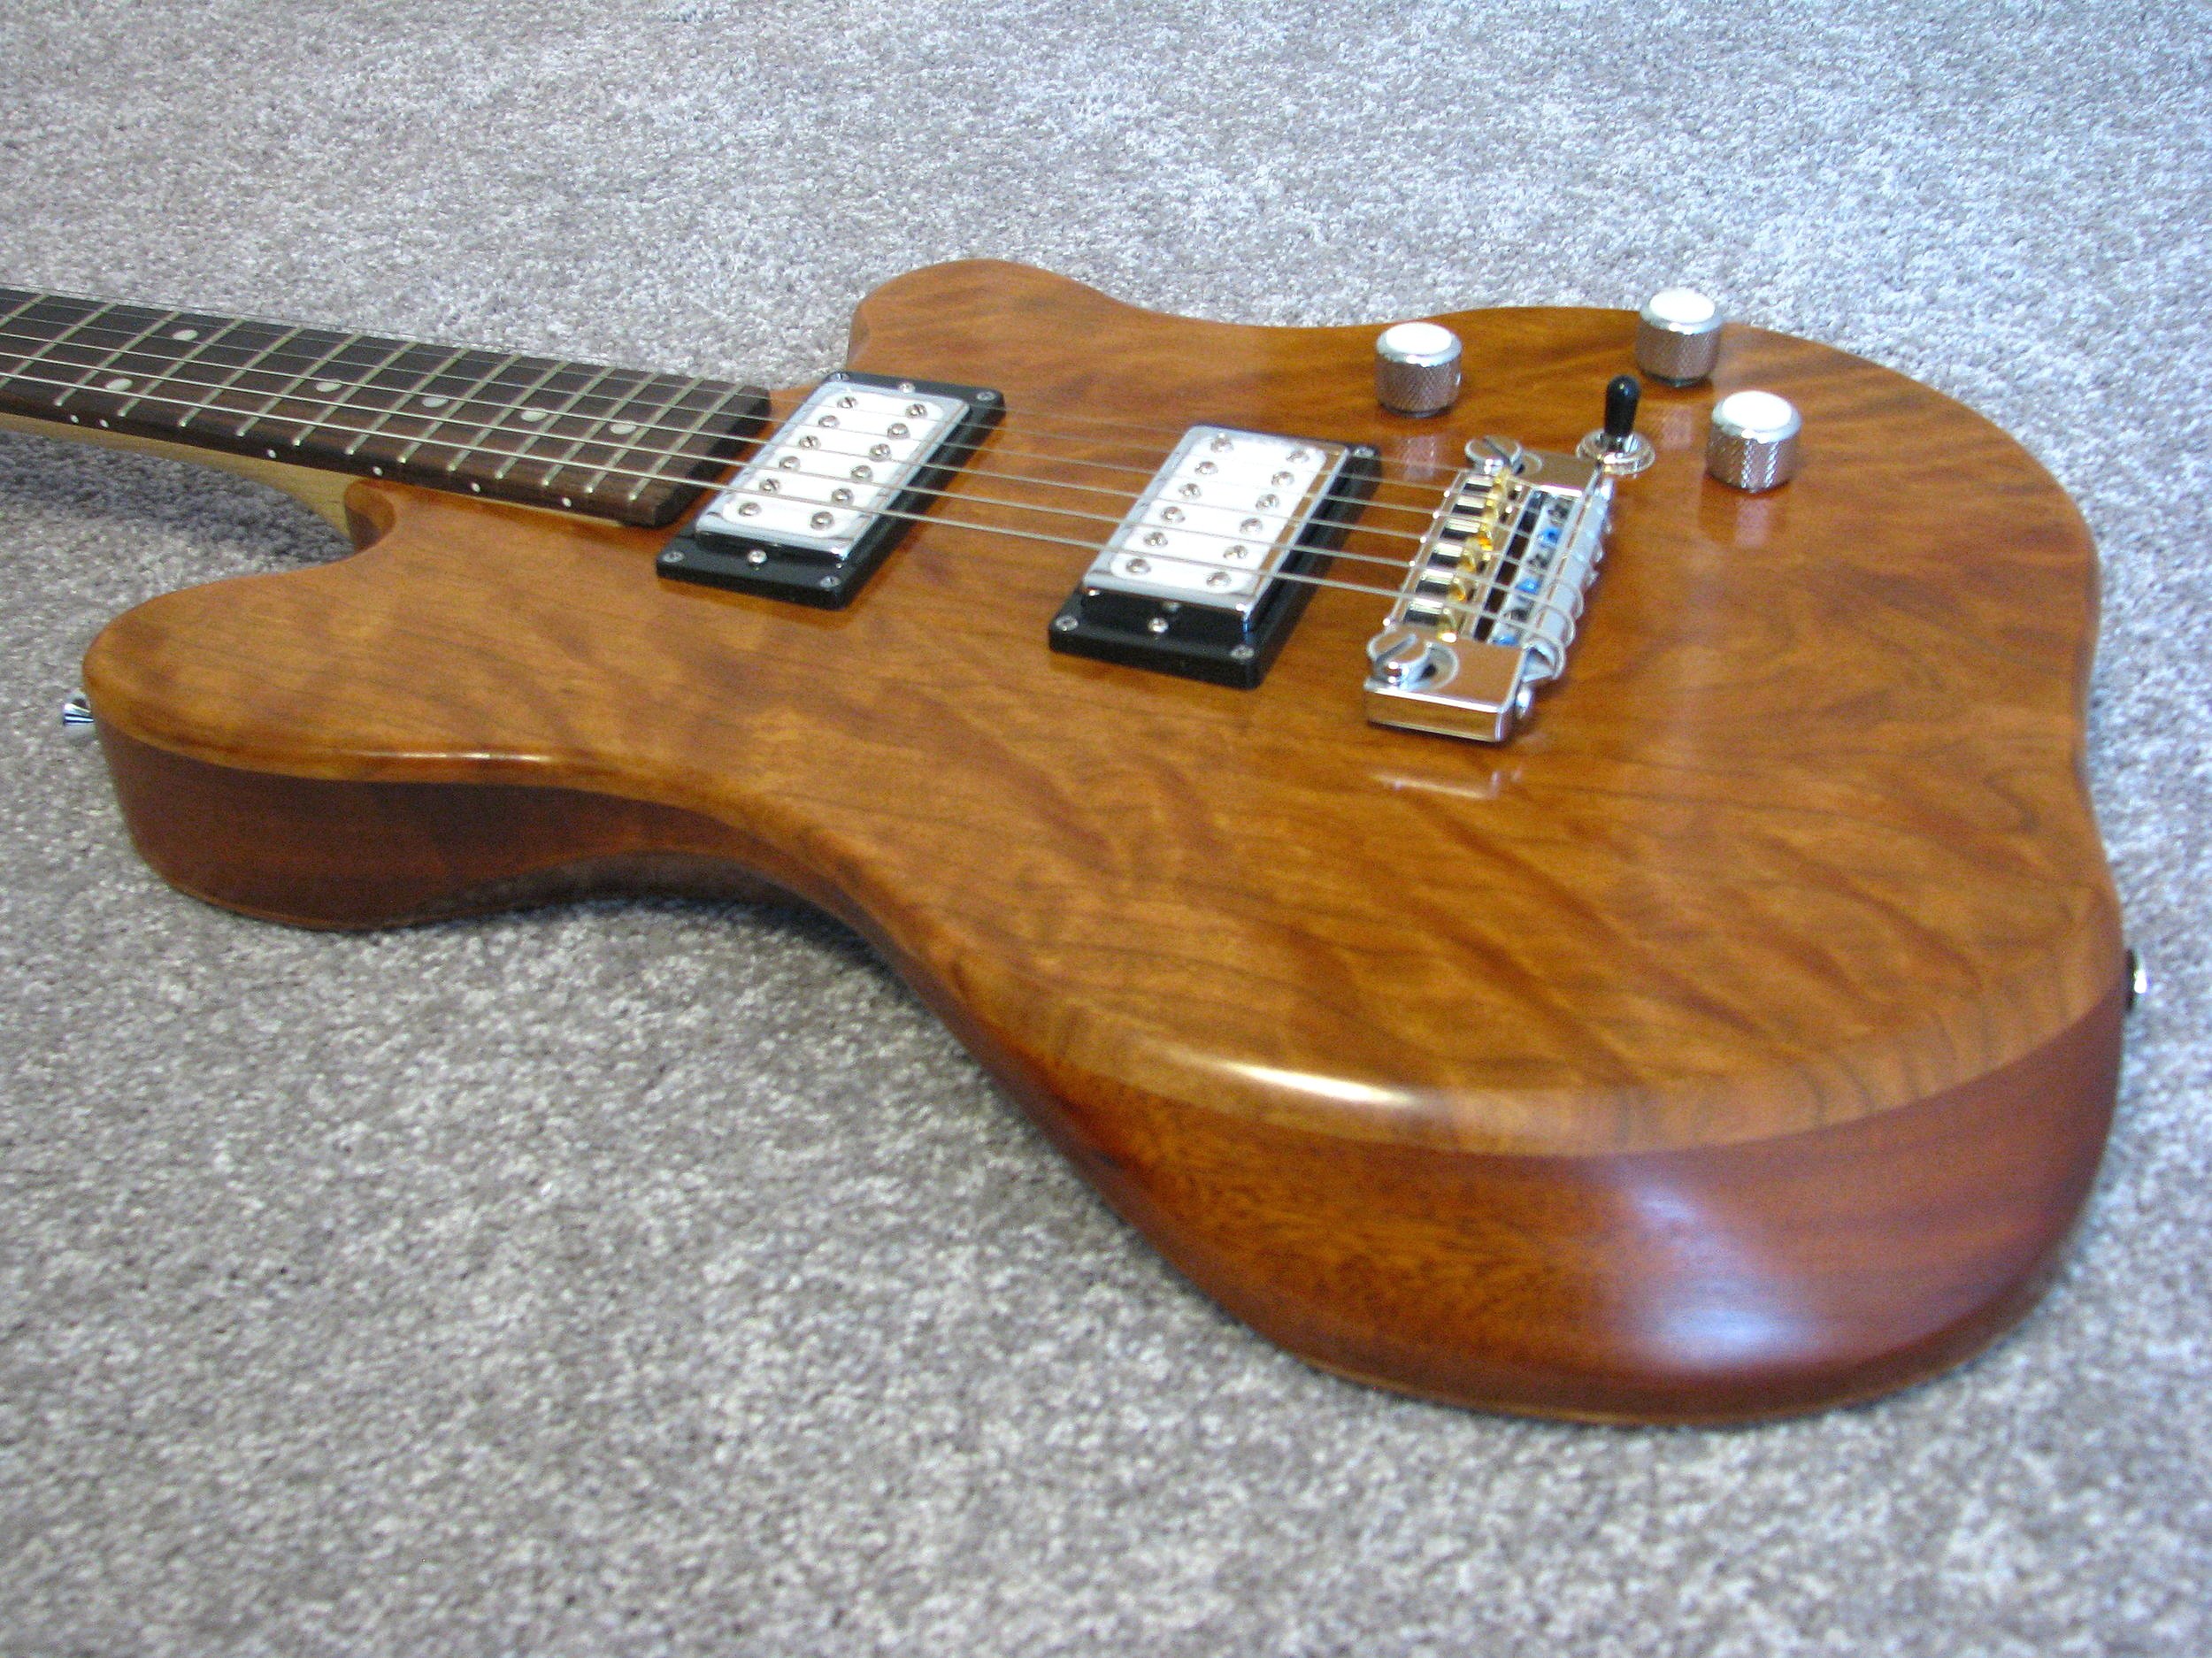
Here is a "driver's view" of the curly cherry Hybrid. The contrast between the surfaces and the core is quite attractive. Several players have already commented on how comfortable the feel is (LIGHT) with the body relief cuts. As always, my control circuits are intended to be stage friendly and provide an exceptional variety of tones on the fly.
You can also get a good look at the gunstock finish I've used on this guitar. Even thinner than sprayed Nitrocellulose, and just as durable.
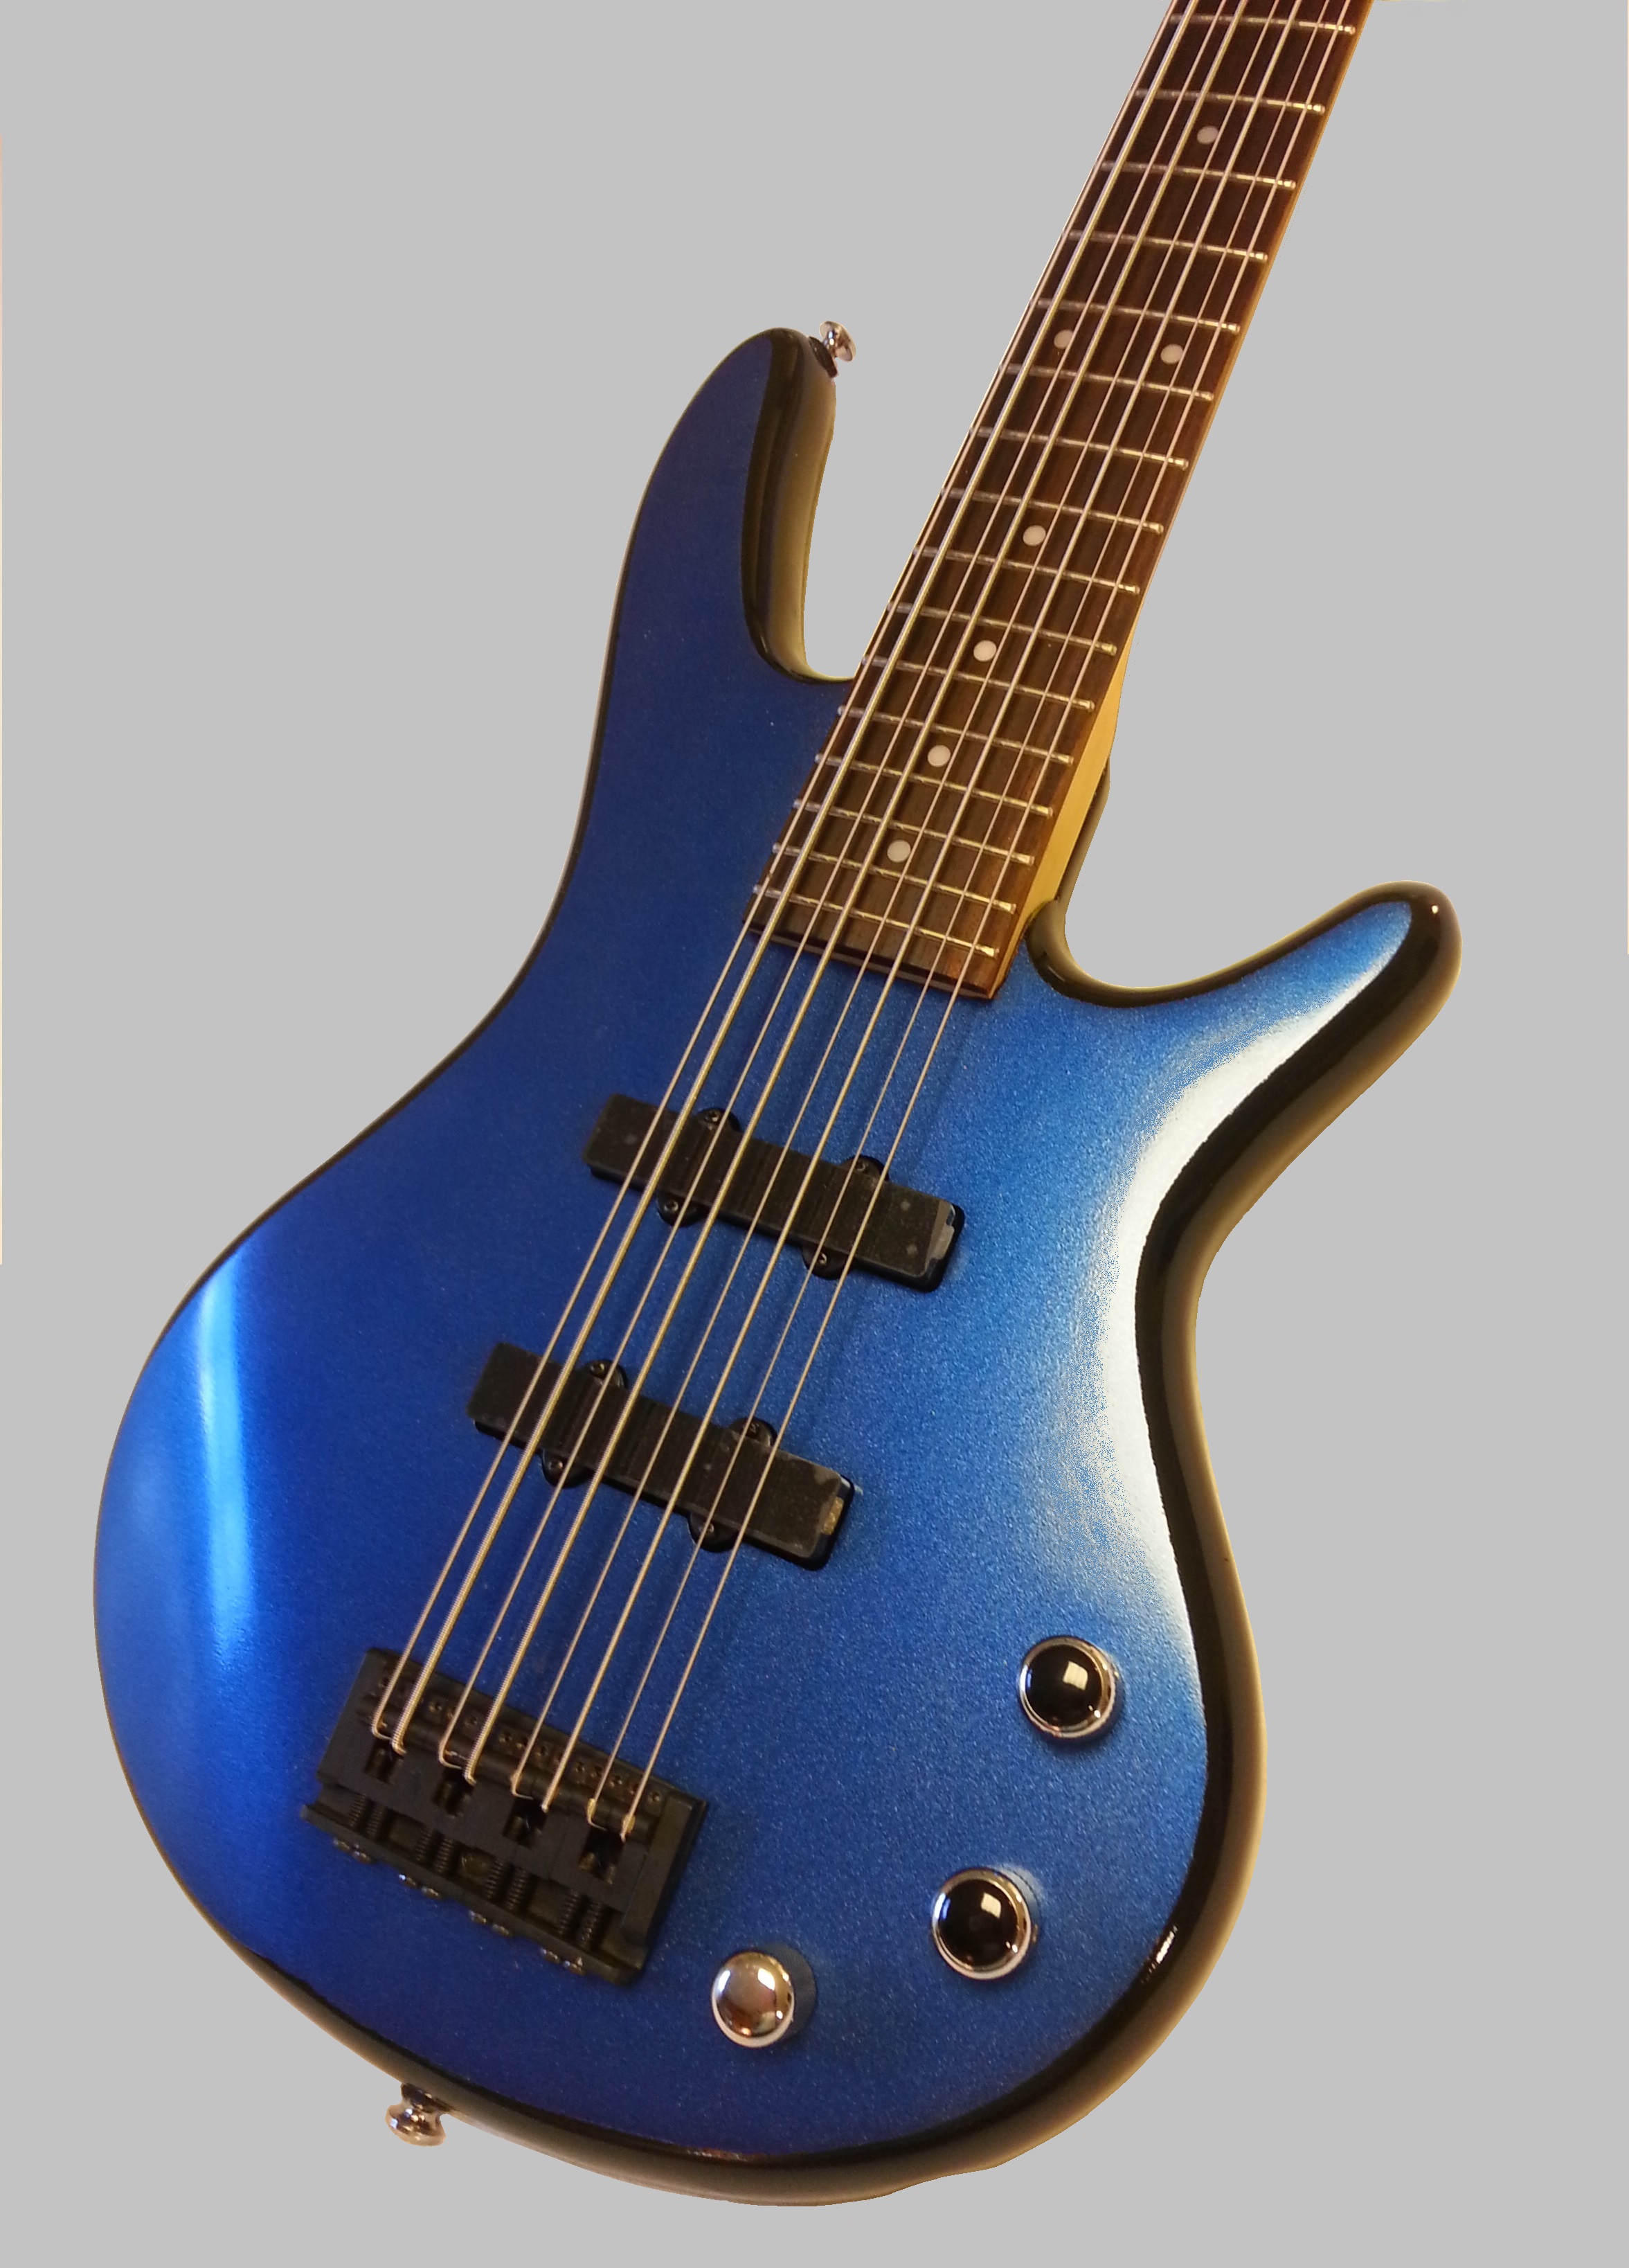
This is a "body shot" of the 5 to 8 string bass conversion shown in the bass gallery. You can get a better look at the massive ABM bridge plate, and metal flake blue with black edging finish.
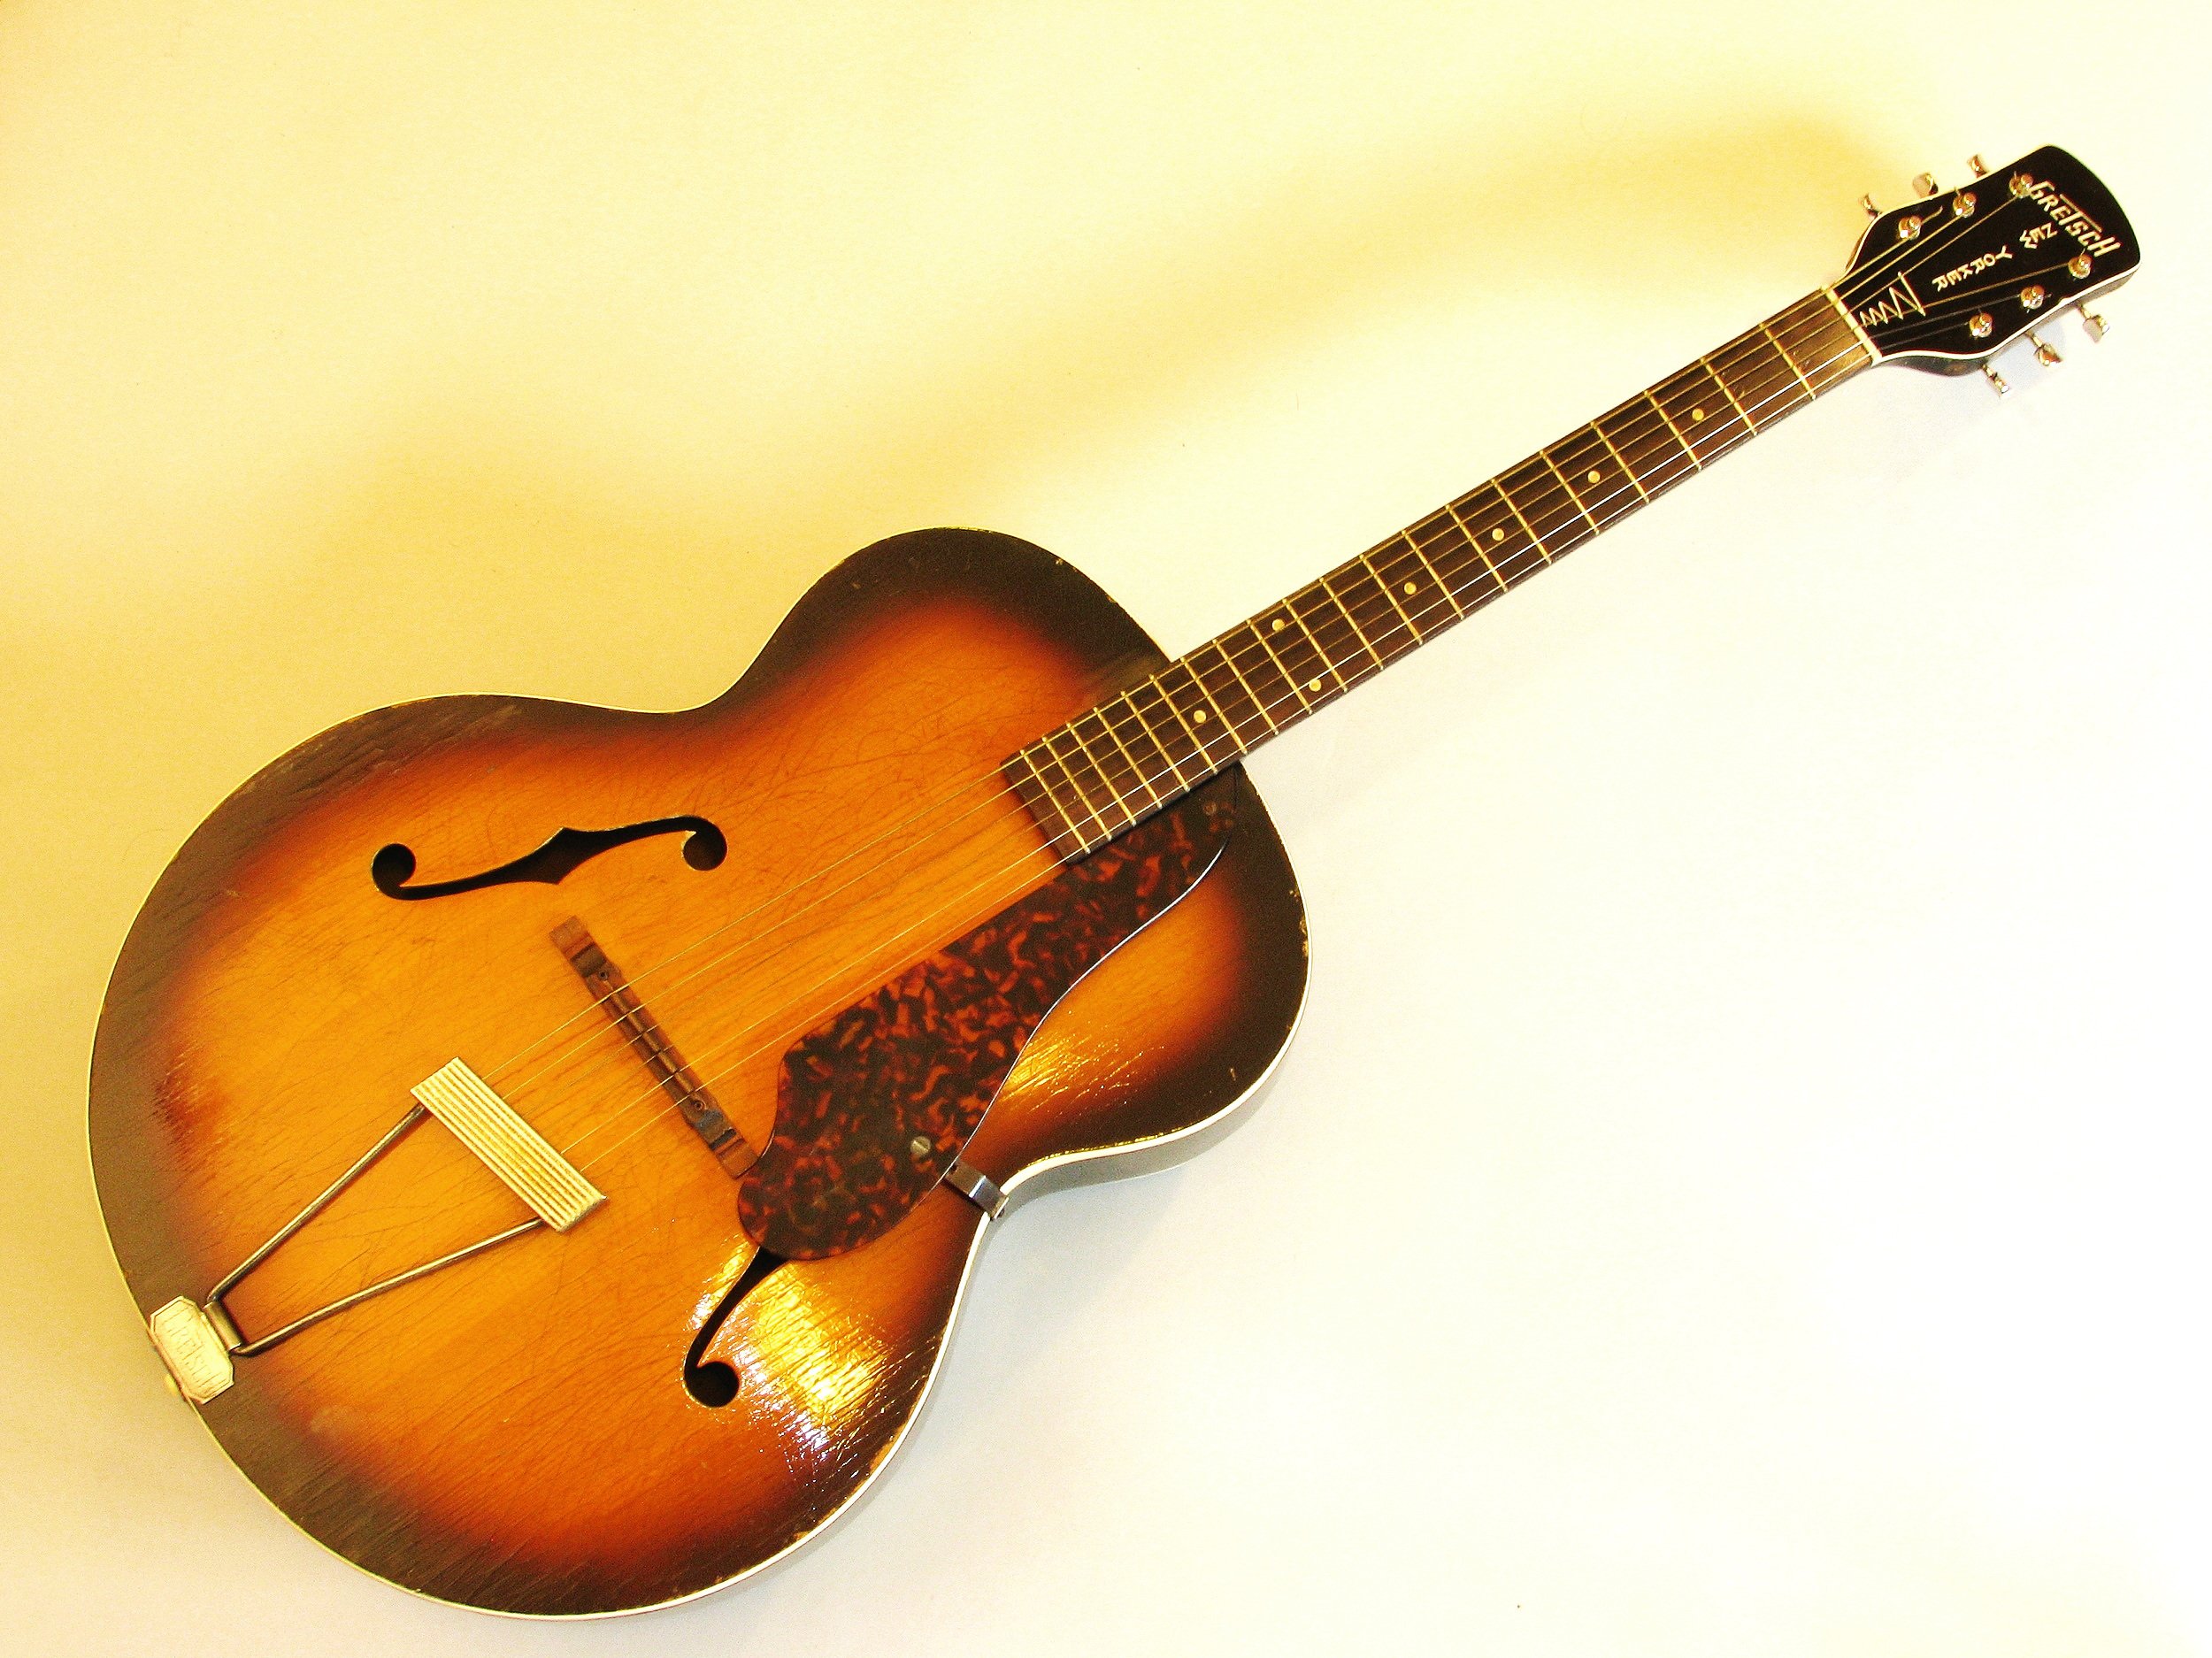
This 1952 Gretsch New Yorker was a classic basket case! The dove tail neck block had split so the neck was impossible to reattach. I devised a clamping method that reached through the F-holes to repair it . The block, and the neck heel both needed more repairs to restore a good solid fit. The"repaired" headstock had split and delaminated. These were properly mended, but scars remain.
A Micarta nut, a replacement set of Kluson 3 on a strip tuners, and 6 replacement frets were required. The lacquer finish is a bit crazed, but it, and all the bindings, and pickguard are original.
The neck has no truss rod, so the action at the 12th fret is a bit high. The lower frets are very playable with a big, round, warm tone with great projection.
This instrument wants a collector to adopt it into a good home.
Price (with new medium grade hardshell case) is $620.00.
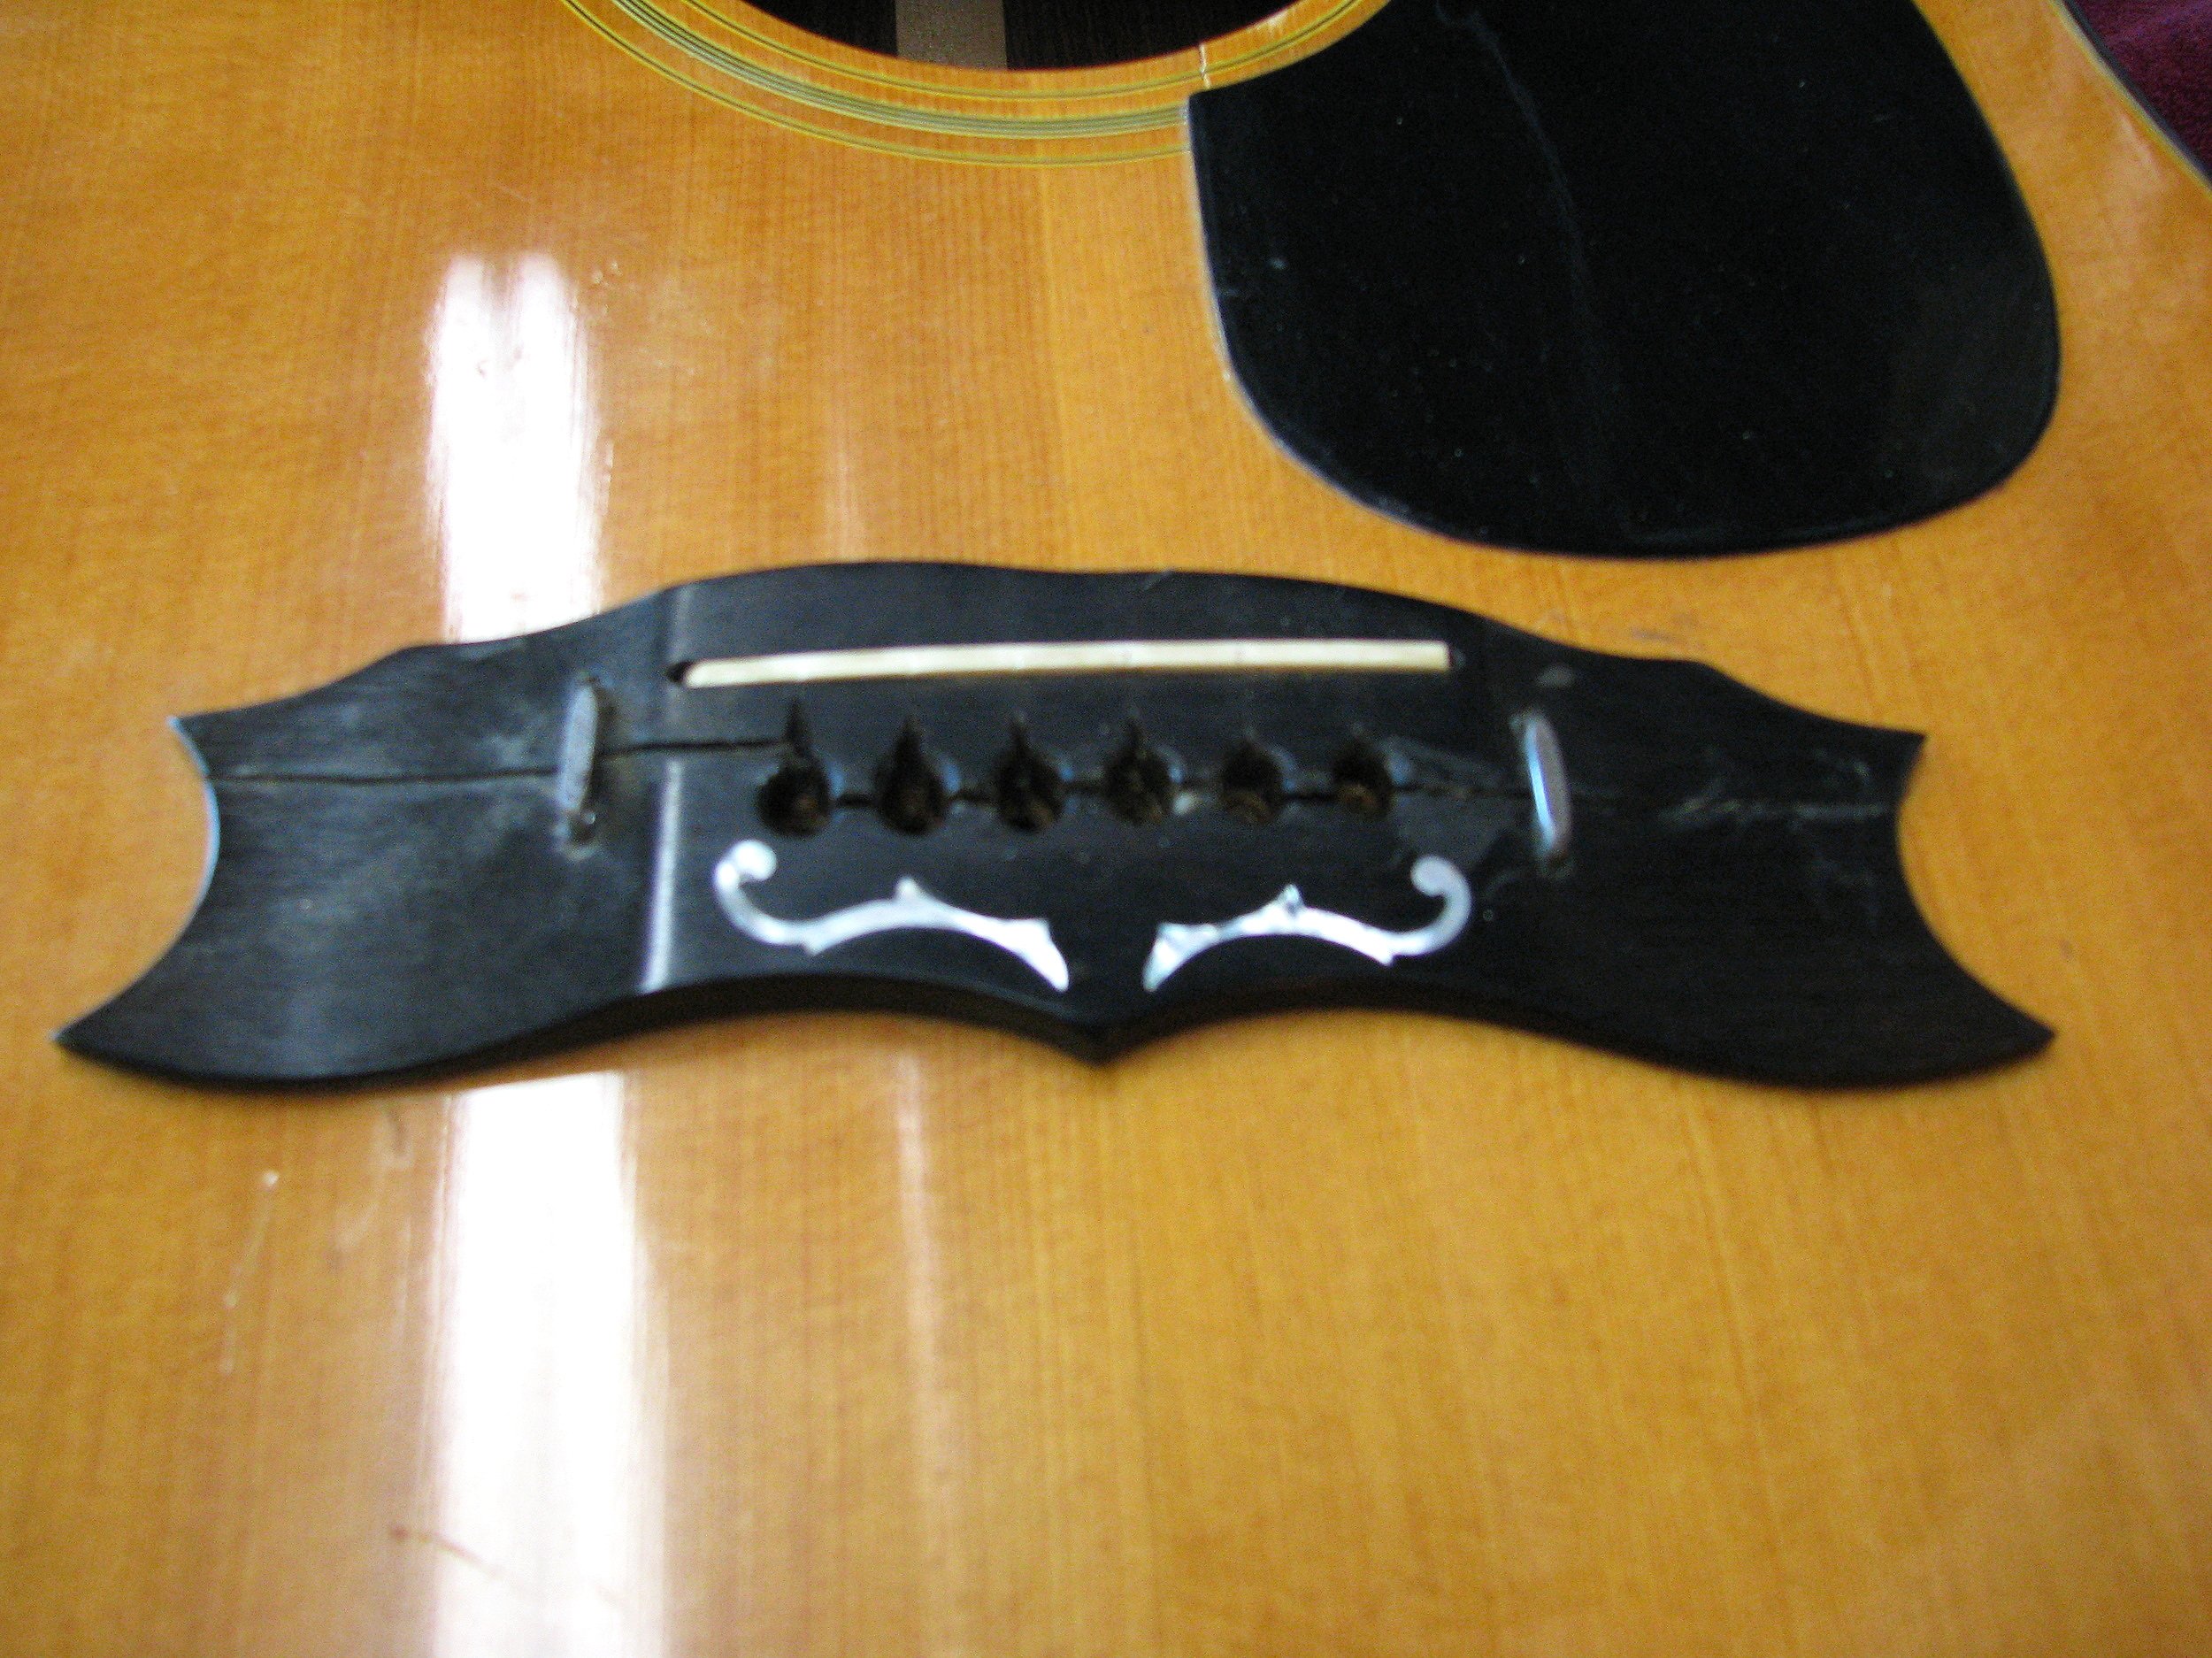
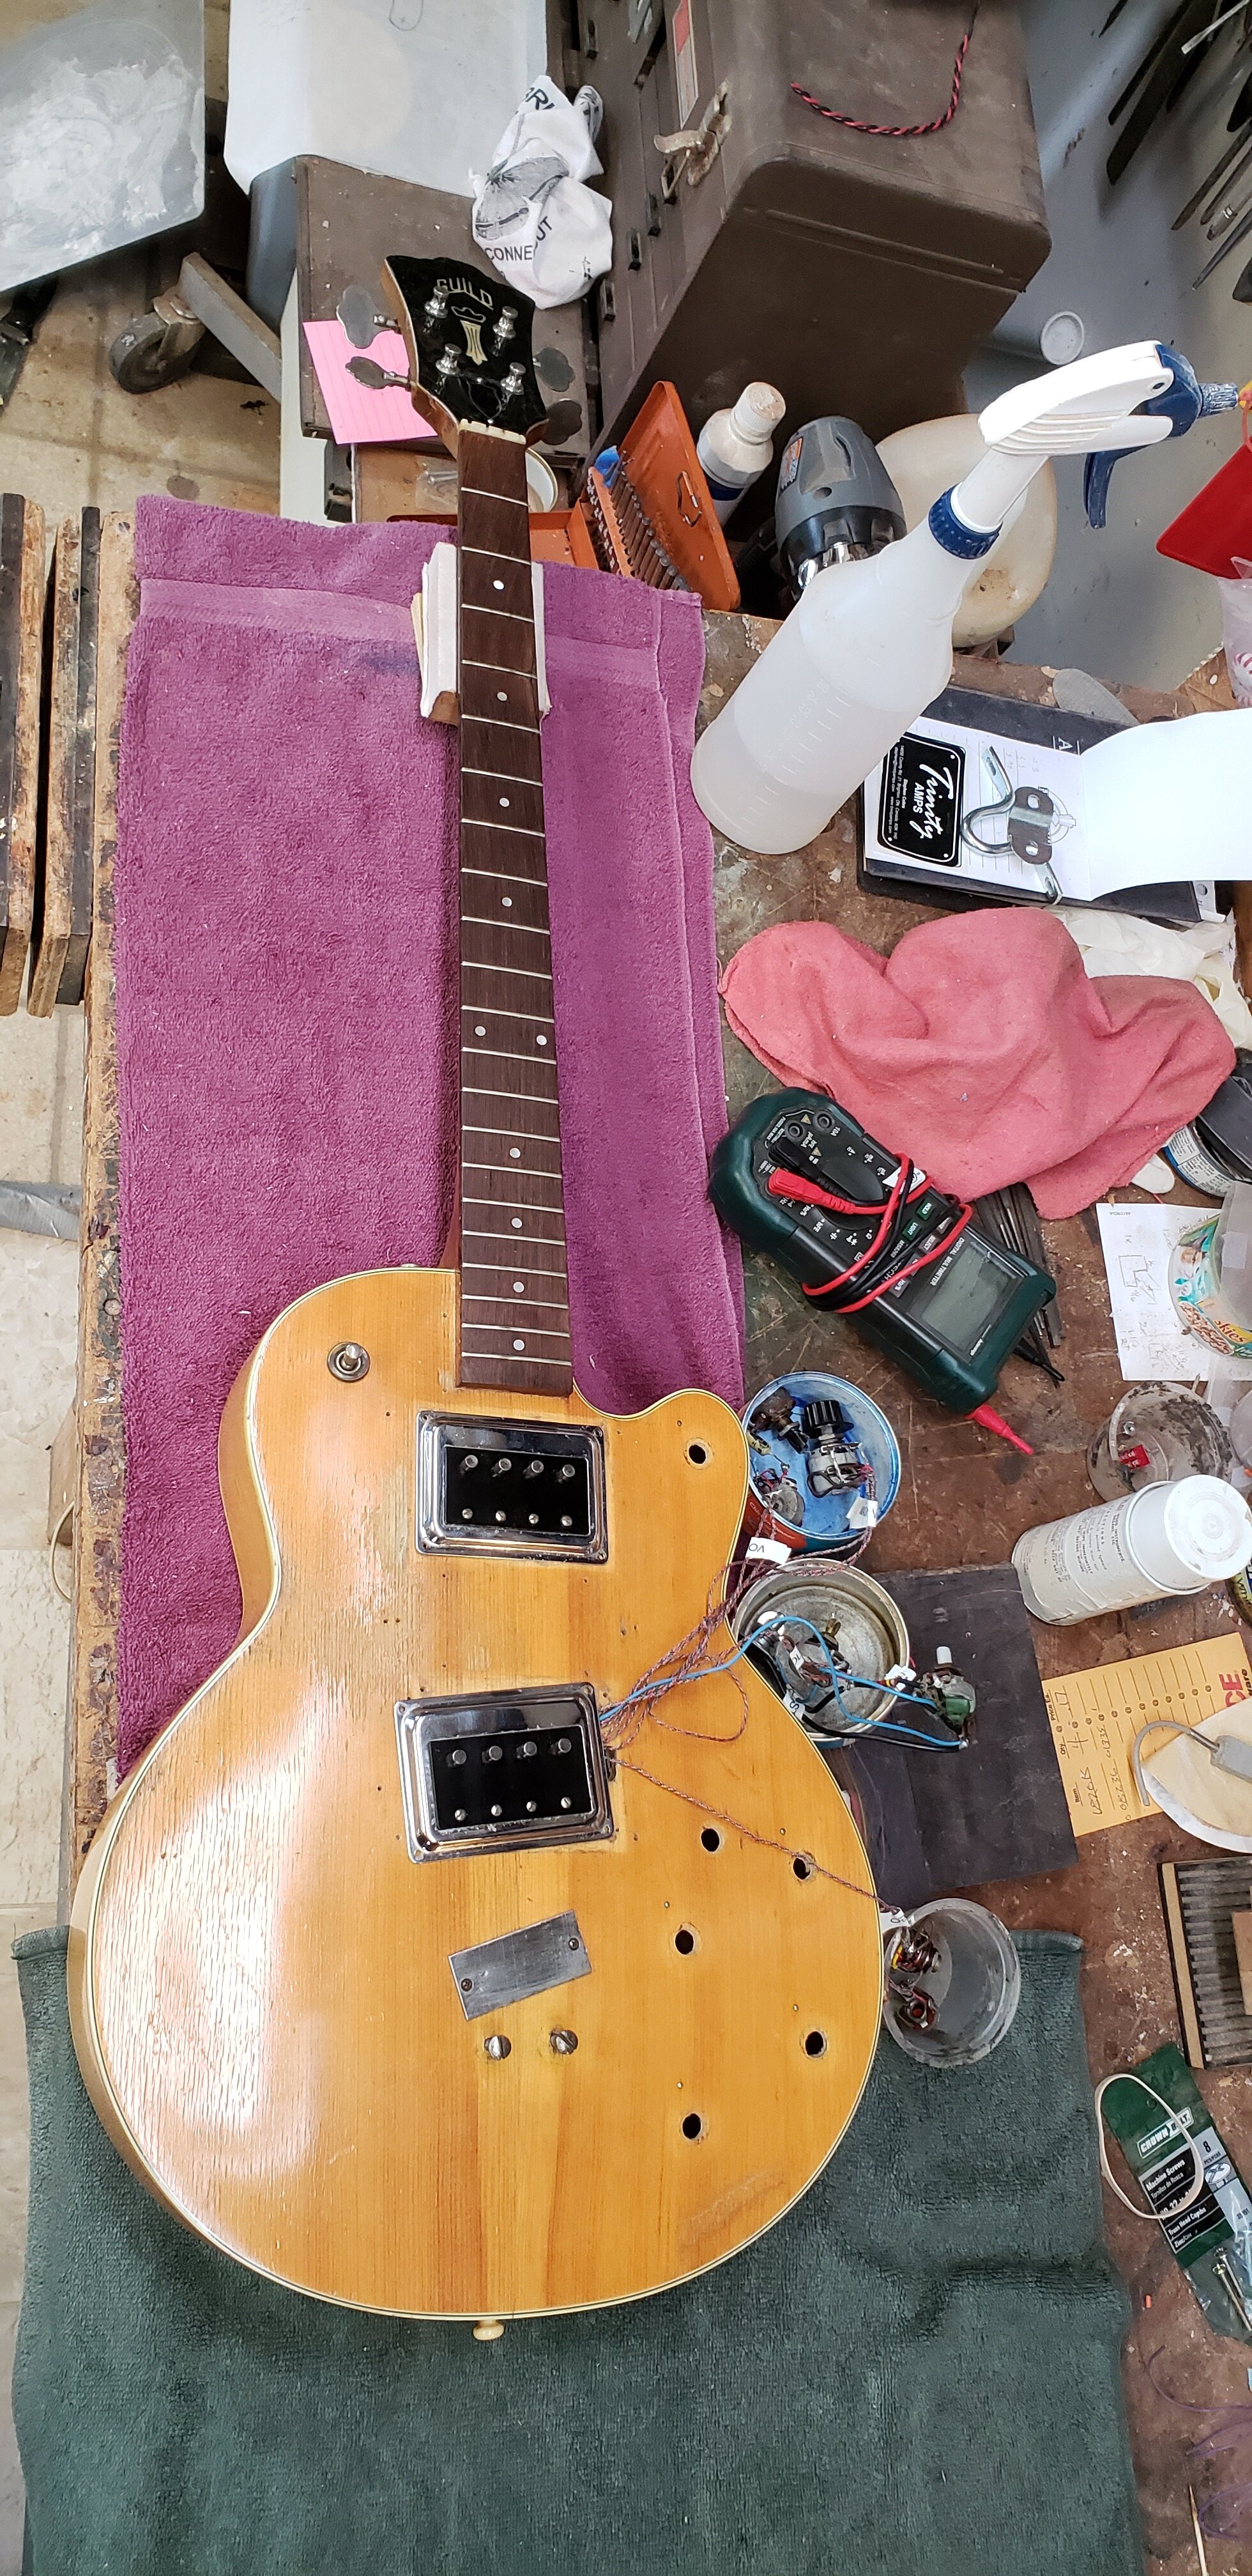
This customer's Gibson had been his father's with a history only possible from the streets of New York City in the late sixties. The "repair" to the original bridge included a couple of Electric staples. (Like the ones you use to hold Romex cable to your 2x4 studs in house construction).
There were other issues including a broken (off) headstock, back bent neck with corroded truss rod, worn nut, and some other "minor" problems.
The restoration of the bridge was foremost due to the unavailability of a replacement bridge. The next slide shows the ebony bridge after being repaired. By blending in replacement segments of ebony where original had broken away, the original shape and geometry was restored.
With the repairs to the other more typical problems, this Gibson squared shouldered dreadnought has regained its classic "thump" and power.
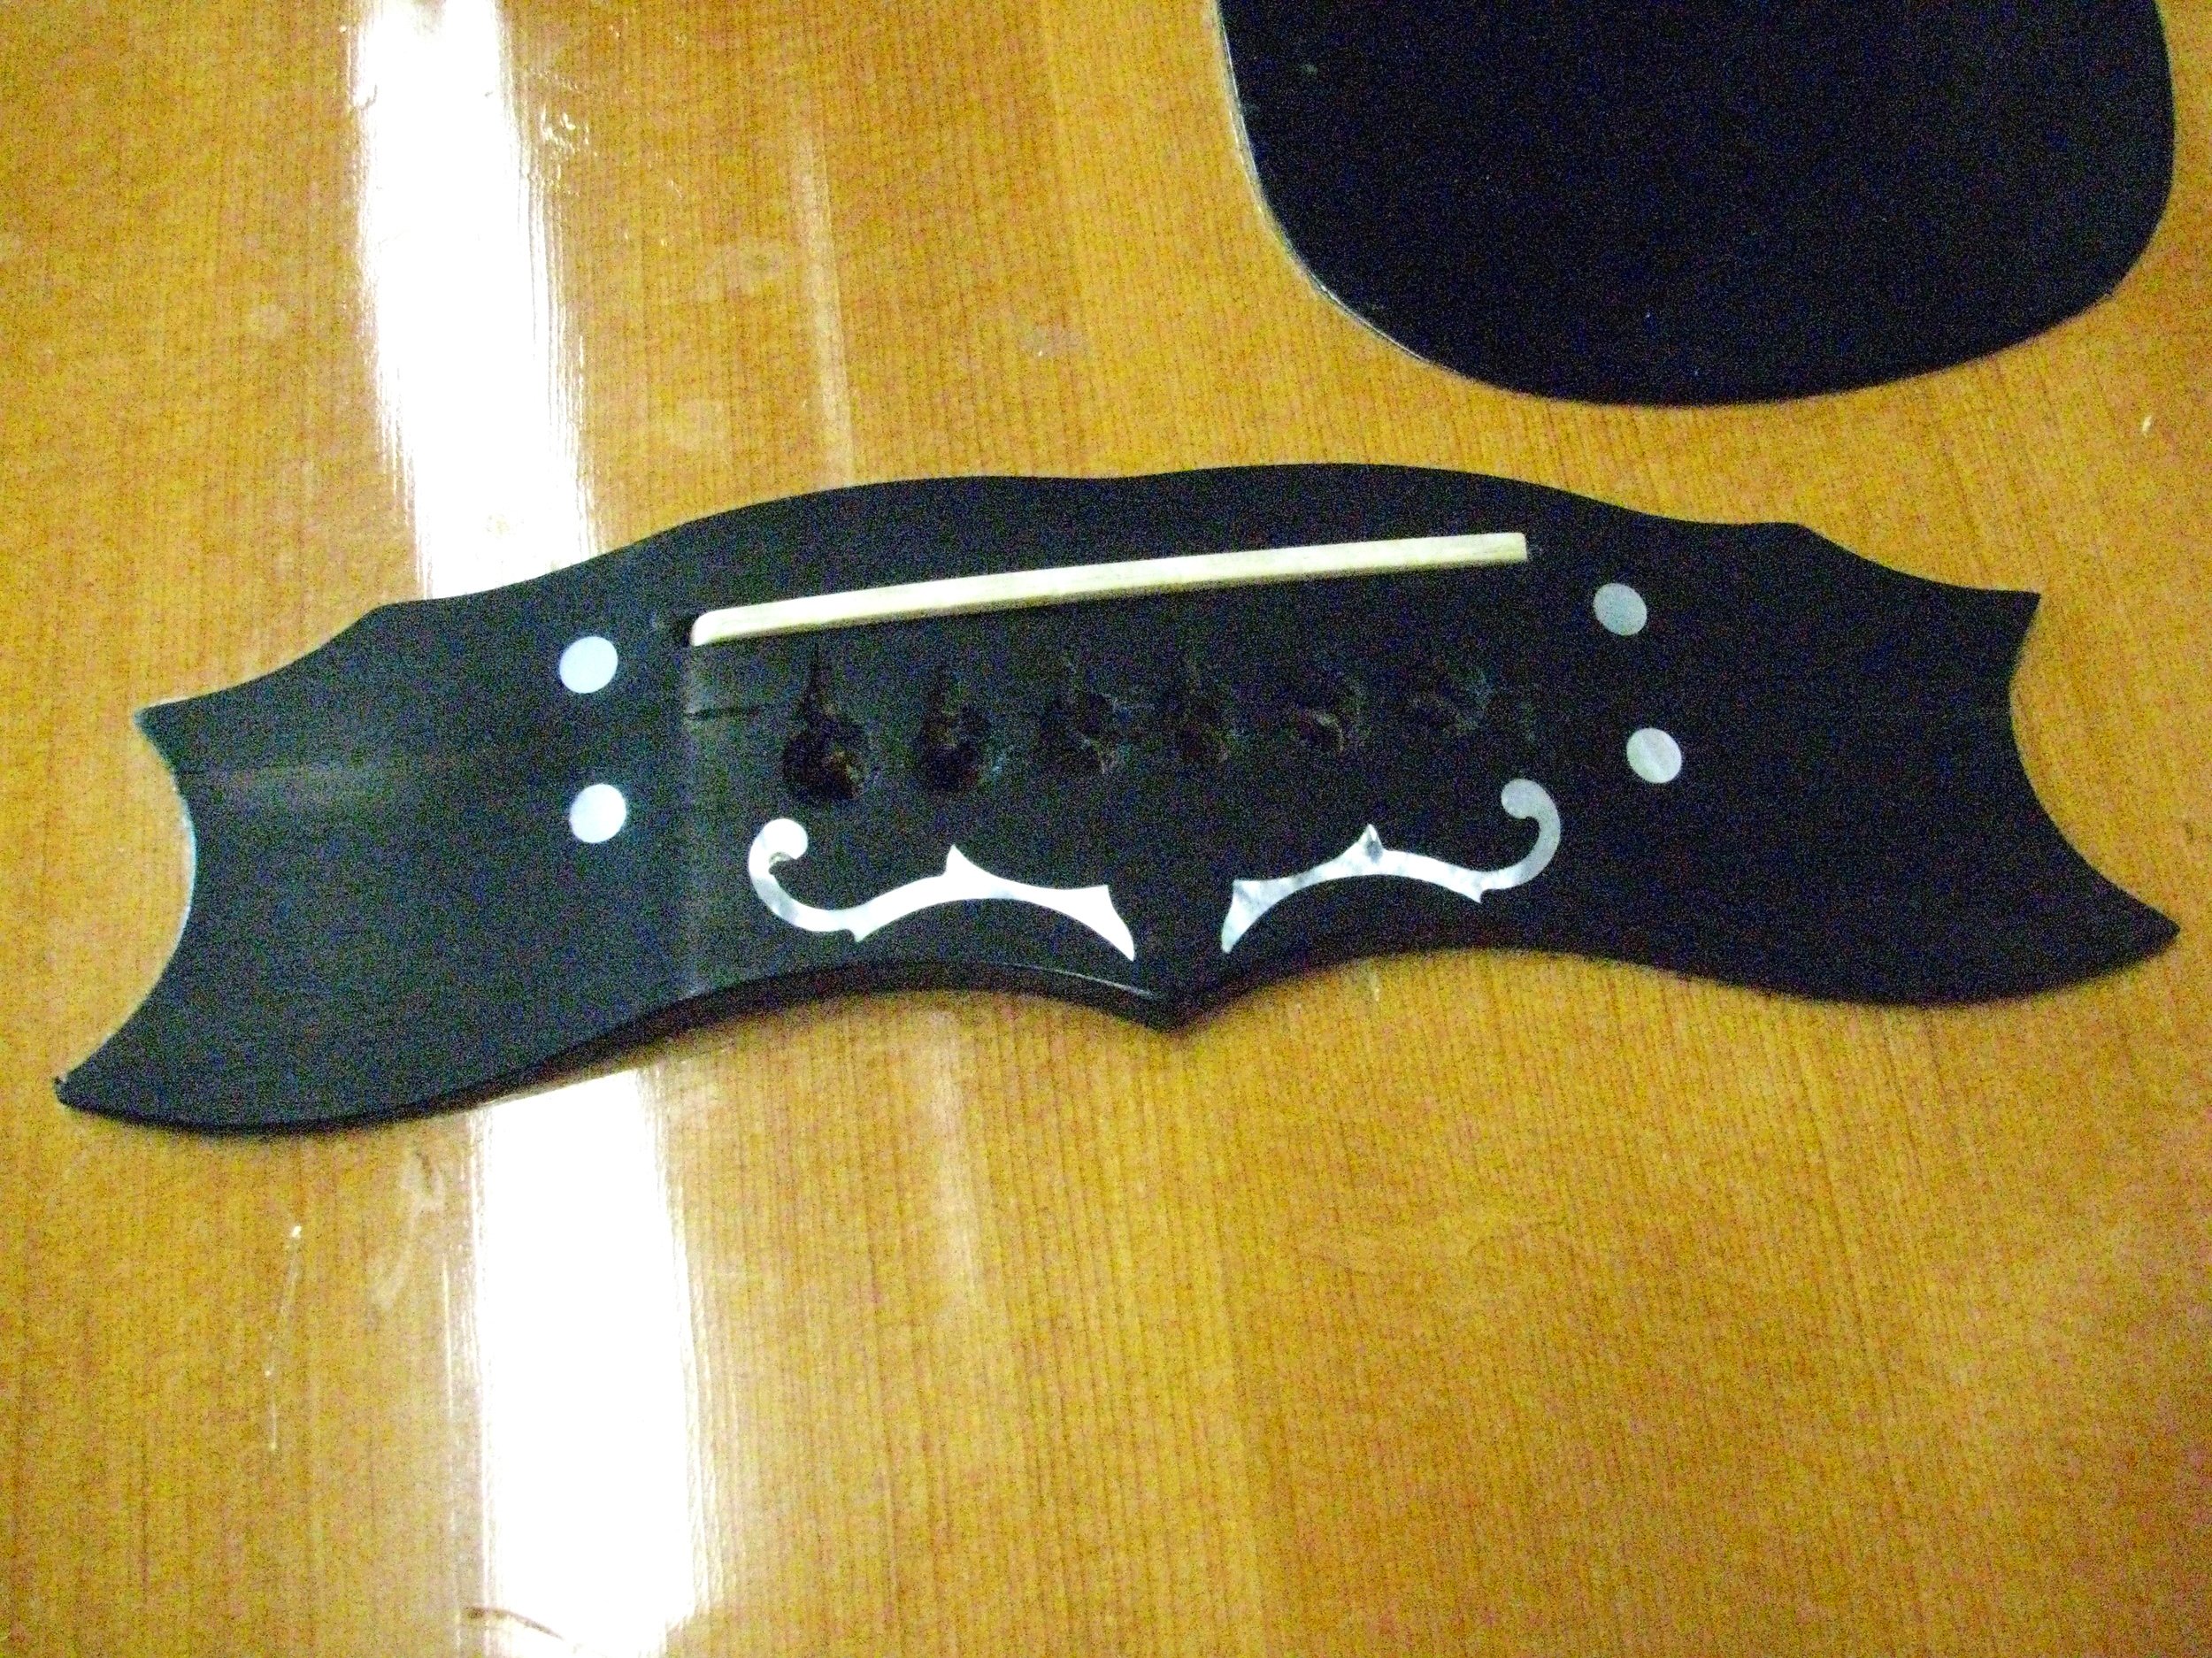
After removal, scarfing in replacement ebony, re-drilling and forming the pin holes, using pearl dots to camouflage the staple holes, and regluing the bridge in its rightful place, the venerable Gibson still shows its heritage, but along with the other (comparatively) simple repairs, plays and sounds like a true thoroughbred again.
In 2007 as I was finishing up my first instrument (the #1 Archtop), a co-worker asked if I could salvage an instrument his brother had begun years before as a RISD engineering project. The original intent had been to recreate a factory Peavey guitar as a custom walnut version. The body succeeded, but there were unsolvable issues with the neck.
I started with a licensed Fender neck as a replacement, but that changed the scale length by over an inch, and the tremolo is a through body device like a strat's. The next two photos show how I re-routed the tremolo pocket's back end, and filled the front end .
Another photo shows Dan, with the finished guitar. We kept the original circuit design, but replaced the pots, and installed some hot Golden Age Humbuckers from StewMac. The pickguard was originally gold, but later switched to black to let the walnut take center stage.
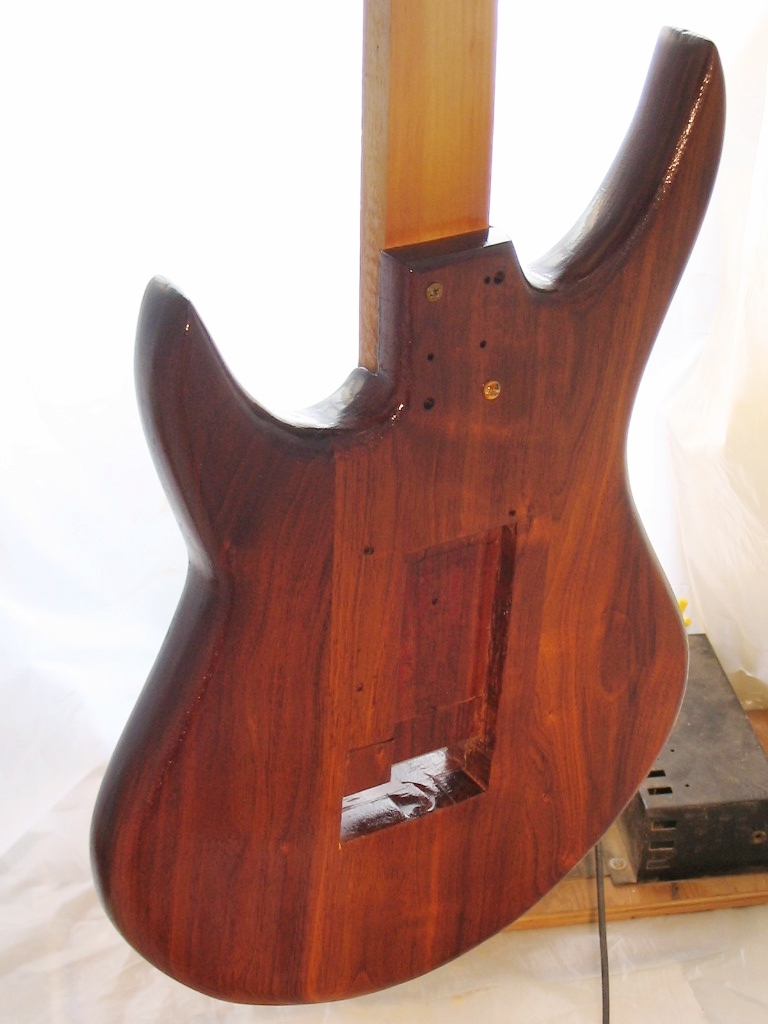
This repair actually required two separate pieces of wood to fill the replaced space. One for the interior "floor" of the trem spring well, and the "cap" on the upper body that would hold the trem stud bushings.
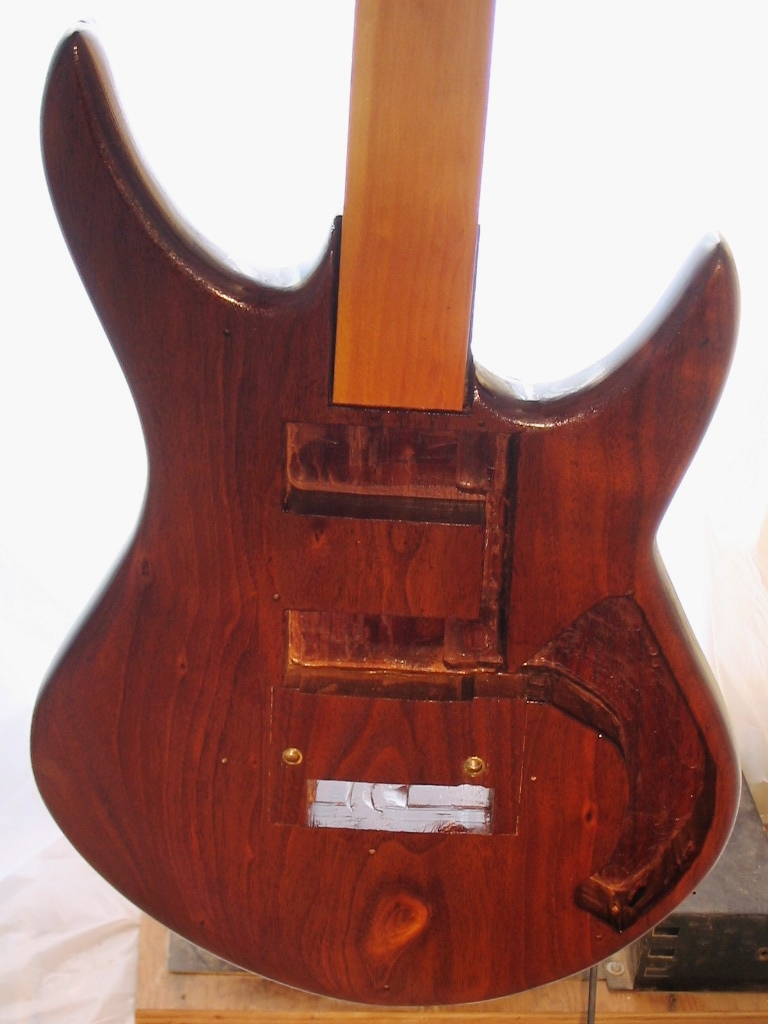
If you look carefully on either side of the trem stud bushings, you can see the lines outlining the remade upper surface. Even though I knew that the pickguard would hide the repair, I tried very hard to keep grain pattern and color consistent with the original body's JUST IN CASE.

Dan asked for a monogram in the headstock that would reflect his brother's initial role in the guitar's creation. We agreed that a simple green abalone BDP would show on the maple and do the job. Dan also requested a change to a black pickguard.
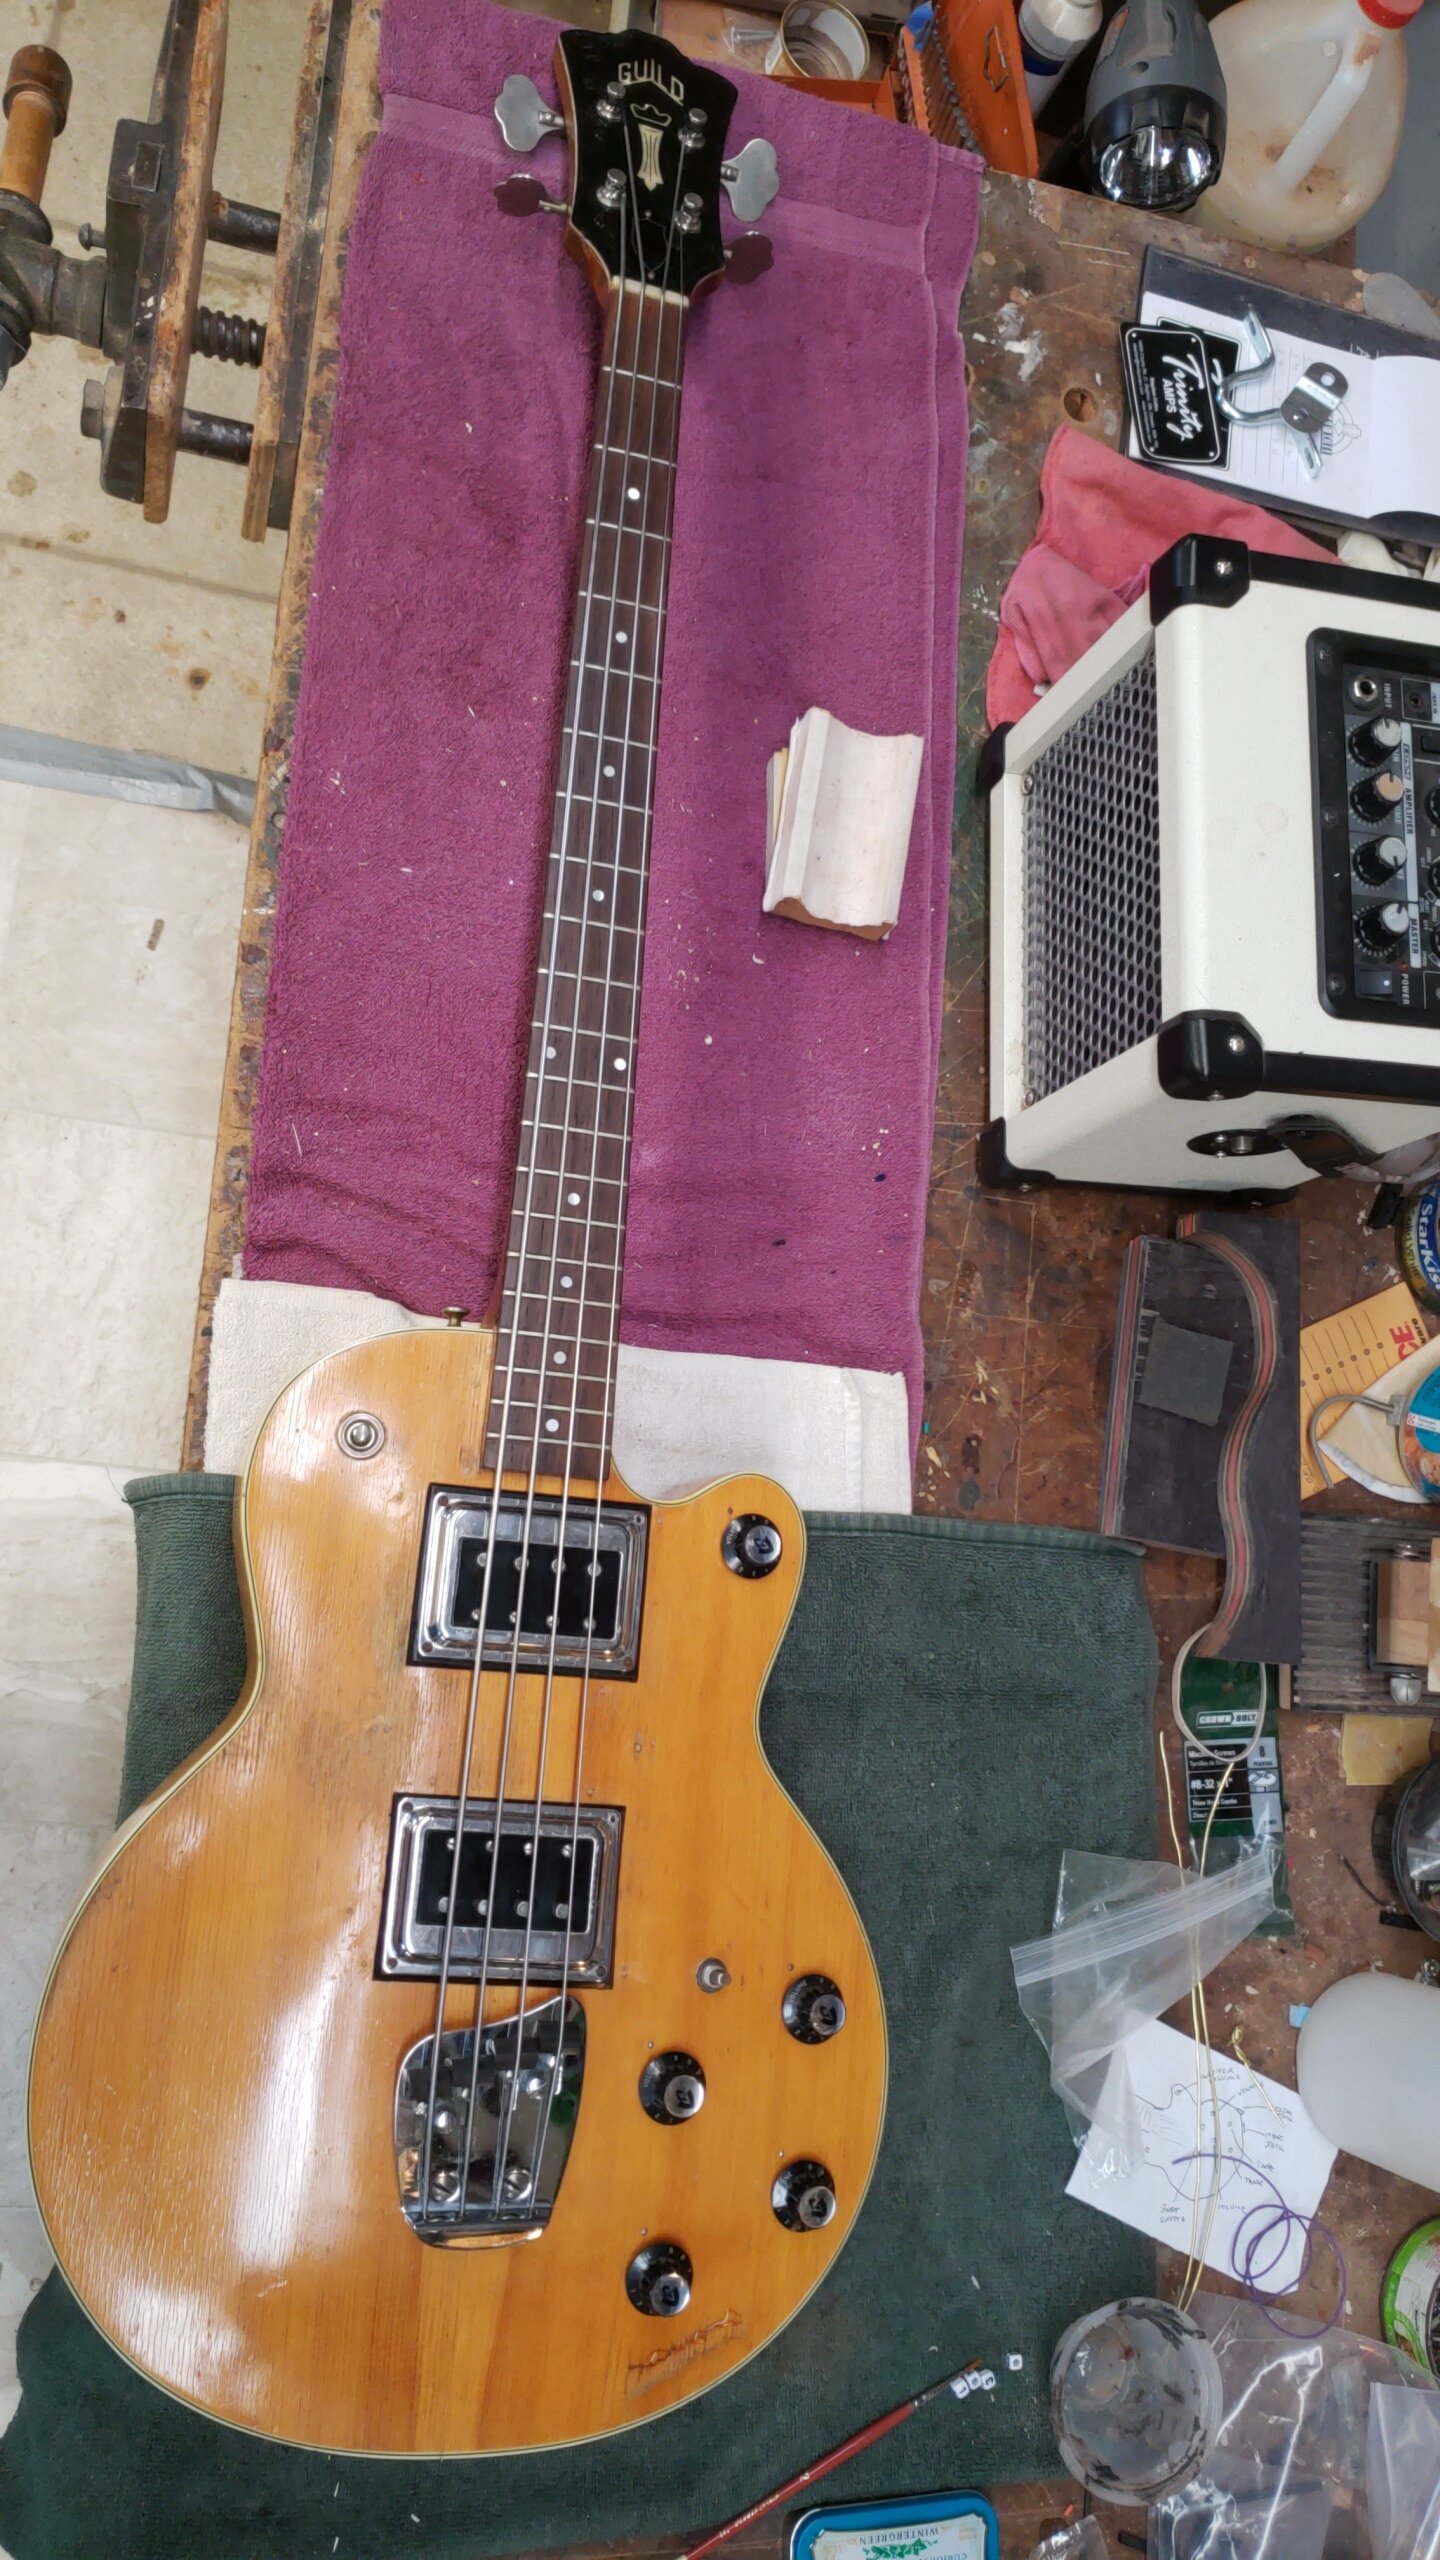
A while ago, a friend from my childhood reconnected with me. He’d been a bass player since he was a teen and had achieved a fair measure of local and national attention in his bands. This Guild had been his long time performing bass with the road scars to prove it.
It was essentially “all there”, just a little mixed up with some tough problems to address regarding the bridge and electronics. Both were very different from anything easily documented.
This was my starting point. We knew there wasn’t going to be a total refinish, but the worn areas should, to protect the raw wood, get sealed. A nasty dent had been earned between the heel block and the control knobs when the bass flew off the roof of the road van after a gig. I was going to do my best to, at least, swell out the damaged fibers to prep for the day when the refin was actually performed.
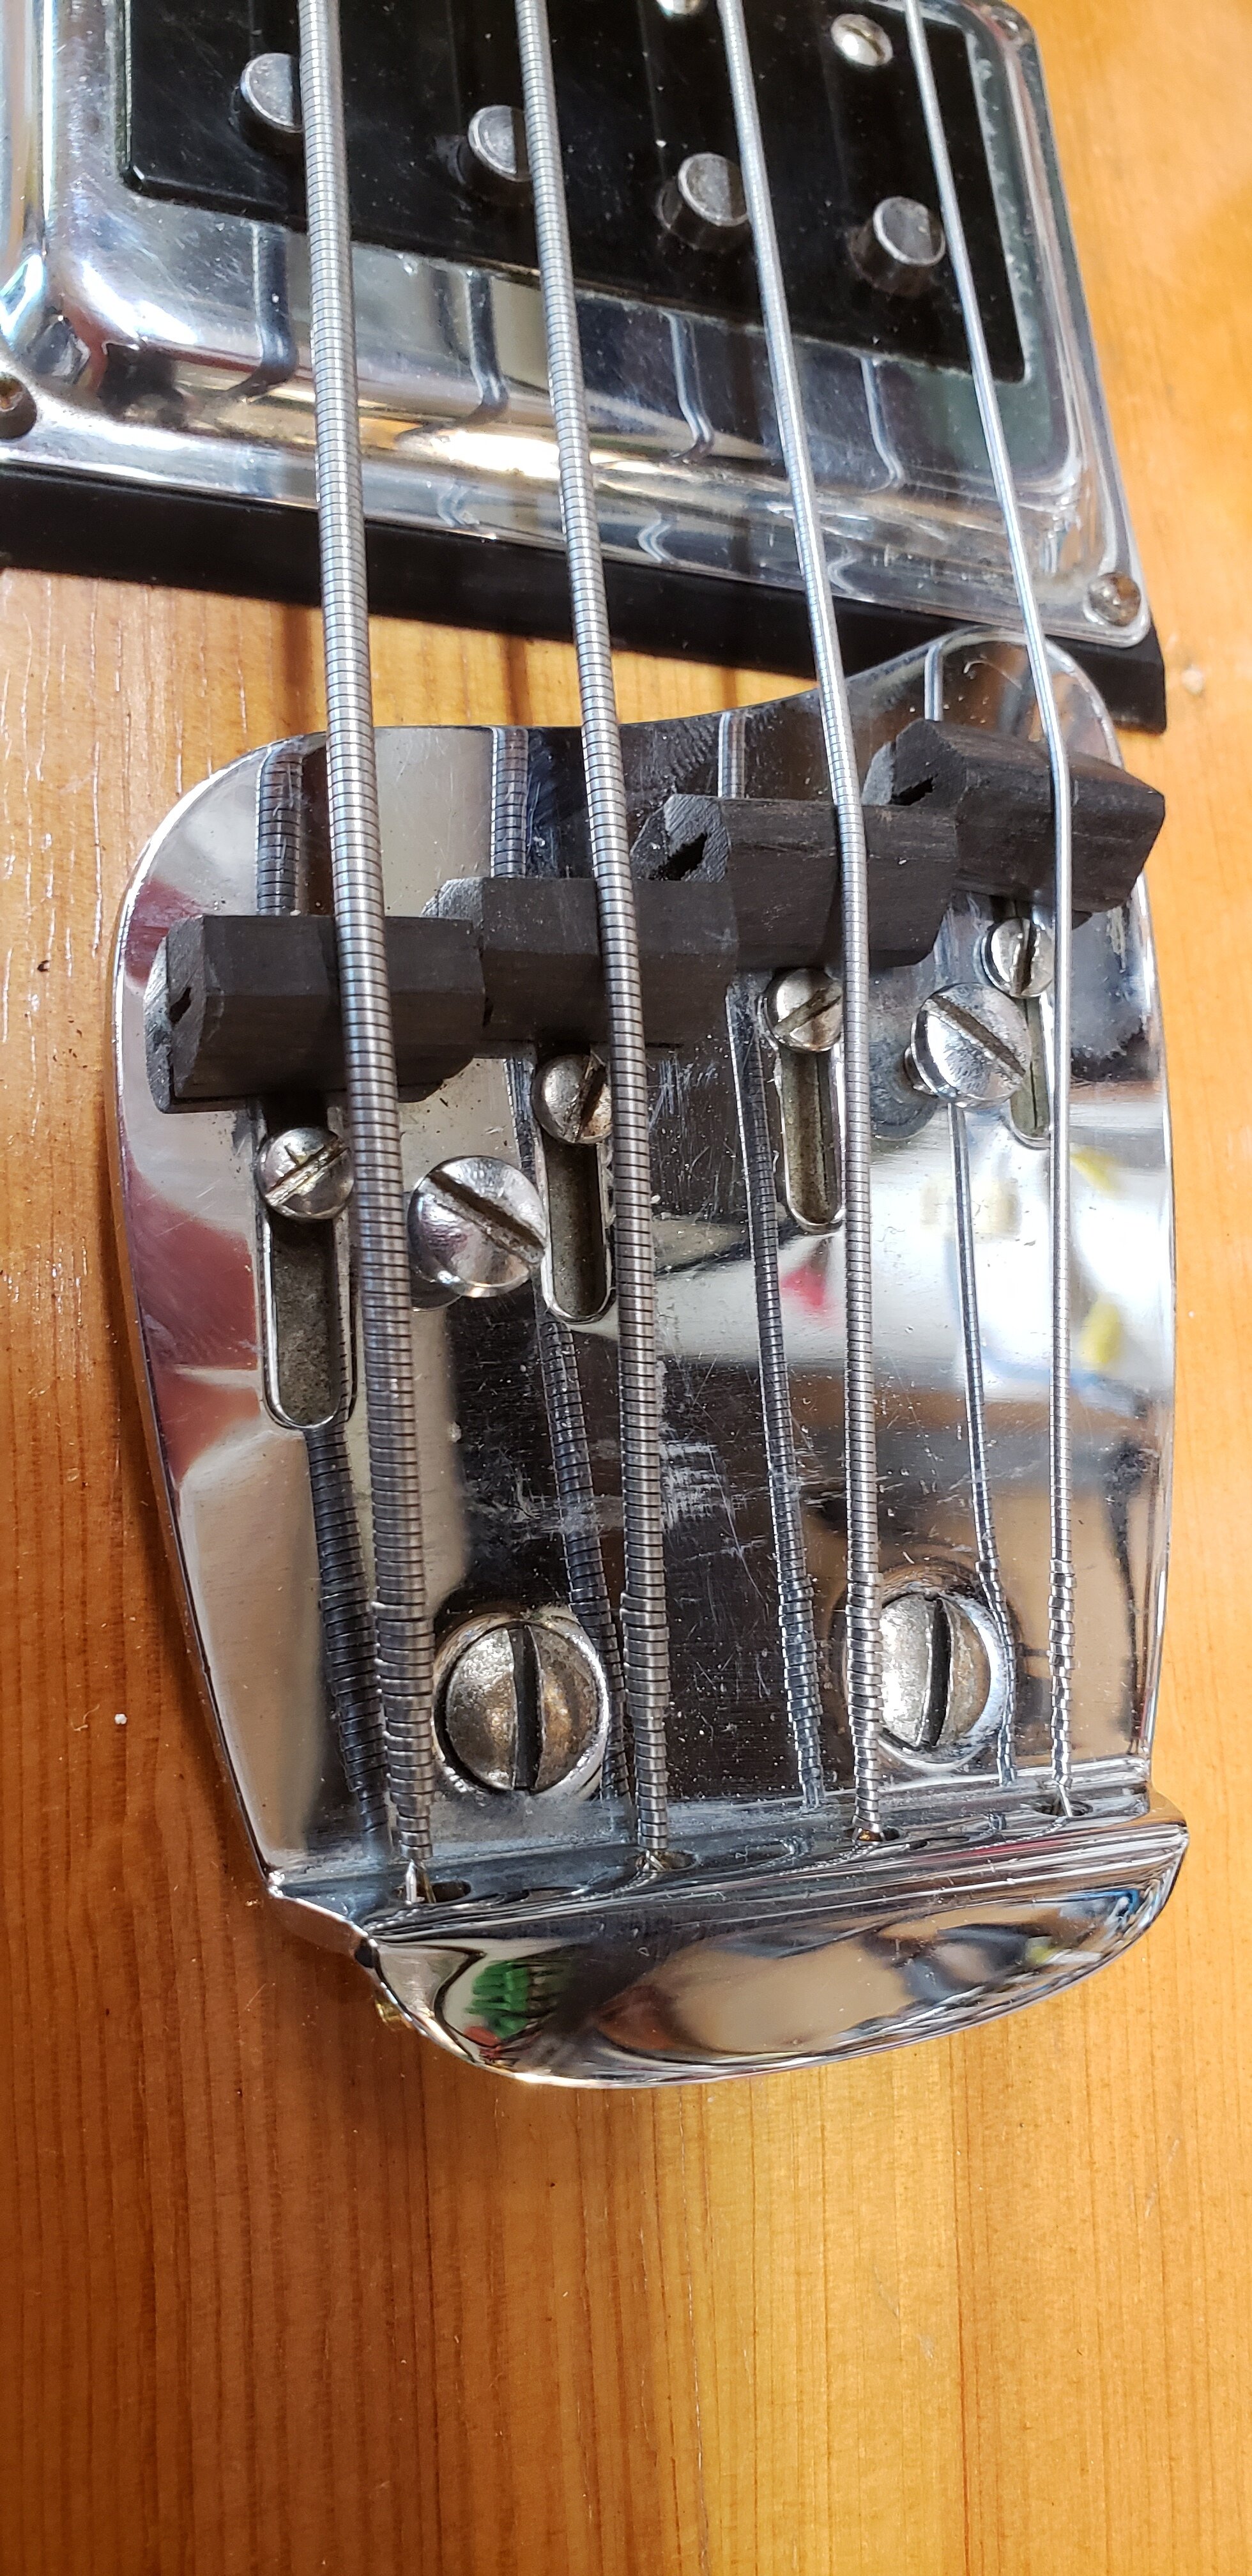
Although they don’t look like much, these were the most difficult part of my repair for this bass.
The intonation system uses ebony pieces that are shaped and slotted to sit on L-shaped metal tabs which handle the mechanical adjustment. 2 of the metal tabs had fatigued and failed and had to be duplicated. The shape had to be correct, and the location of the bend needed to be correct.
3 of the ebony saddles had crumbled and needed to be remade. The slots in the ebony saddles had to be open enough to sit on the tabs without weakening them to the point that the string pressure would snap them. Jobs like this are where my background in jewelry fabrication pay off to keep bench time in a reasonable range.
Well, the work was really for nostalgia and a sense of honor to a righteous instrument more than to take it to the stage again, but this was the result right after tuning and preliminary testing that the circuits were intact and functional.
The dent was swollen out with pinpoint application of water to the fractured wood to swell the compressed fibers. The darkness will eventually fade to match the rest of the body, but until the total refinish is performed, the cross cut fracture will still show.
Light coats of lacquer were applied to the bare spots with an artist’s brush just to seal and blend the raw areas of the finish by the pickups.
It’s a heavy beast, but it plays beautifully and sounds like thunder.
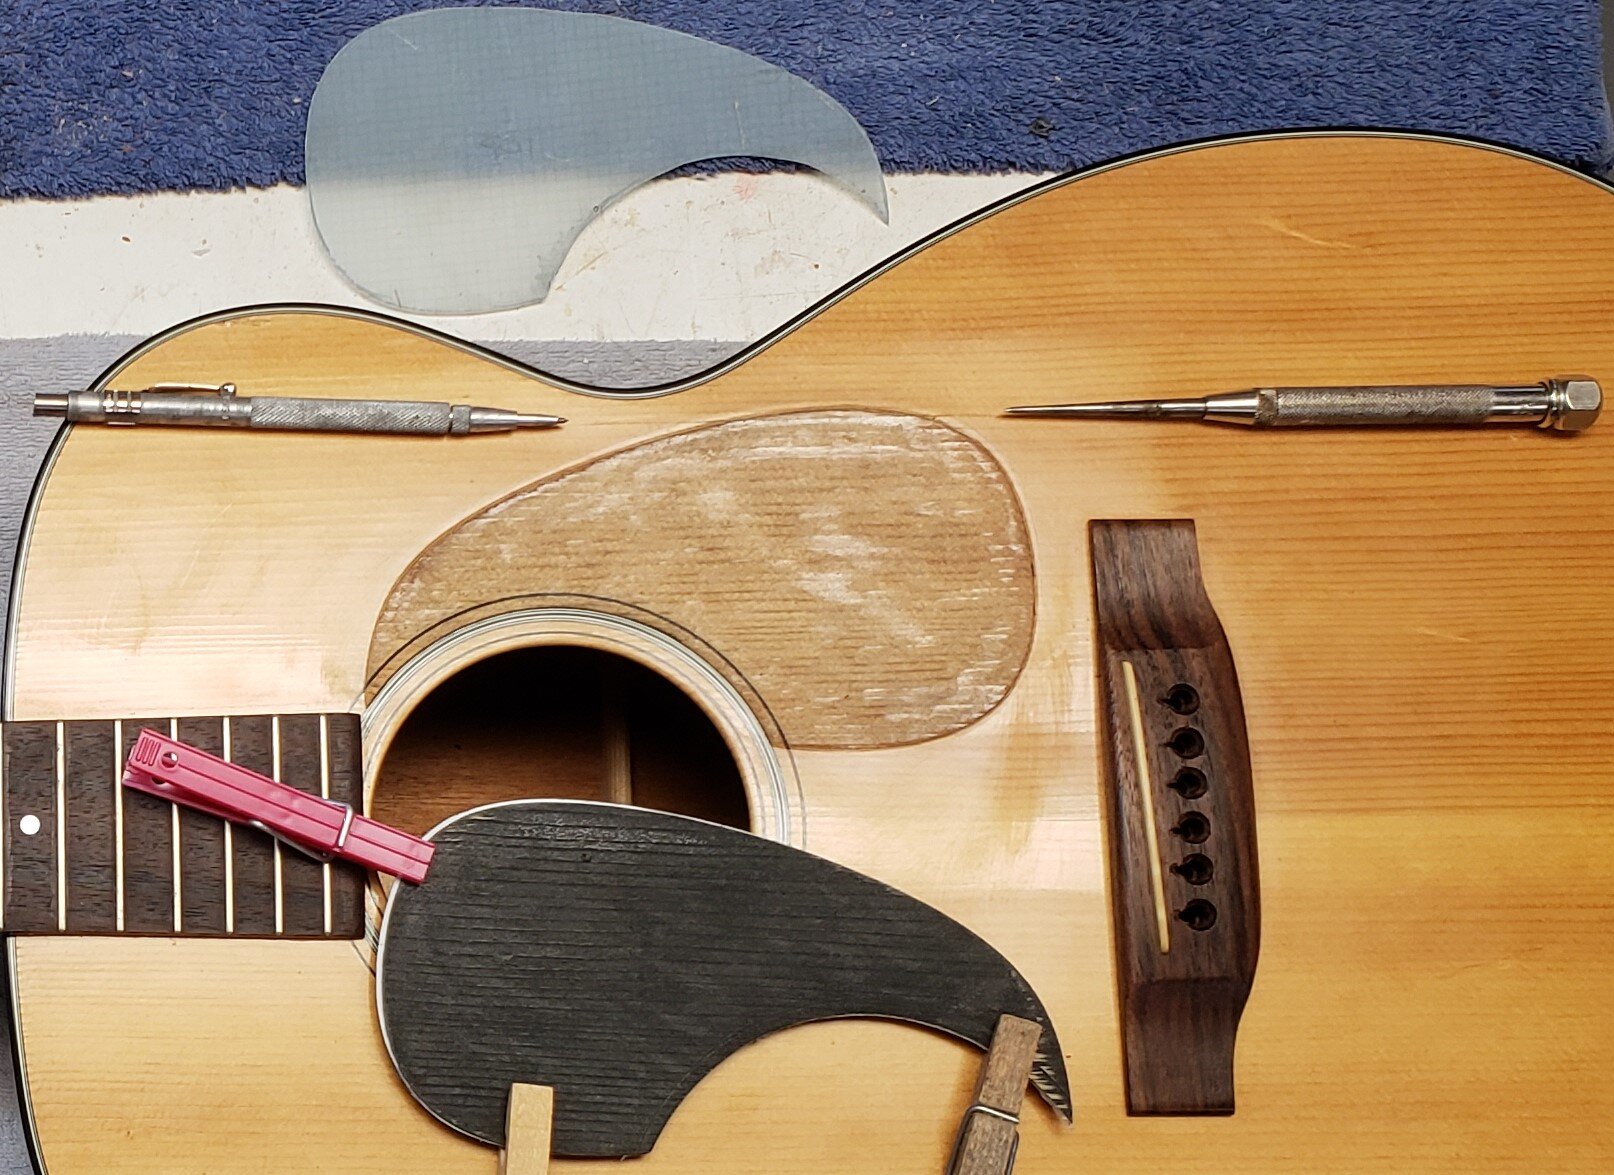
This 1978 Martin 00-18 came into the shop with a lifting pickguard and a warped and cracked spruce top shown here between my awl and scribe. This photo was taken after the warpage had relaxed, but before I had glued, and clamped it together.
Tracing paper let me duplicate the original pickguard shape left in the finish. This is a well documented issue with this vintage of Martins. The idea was to save time and material on each instrument by gluing the plastic guard to the bare wood prior to finishing the guitar.
The plastic of the era was unstable, and the finish increased the bad reaction. The pickguards shrank and pulled the spruce apart on the grain lines. The cracks happen anywhere between the sound hole and waist.
You can see the degree of pickguard shrinkage. I clipped the original guard to my finished replacement. You have to start a bit large, then gently pare down to exact shape with light shears and sandpaper. If you cut too much, you start over.
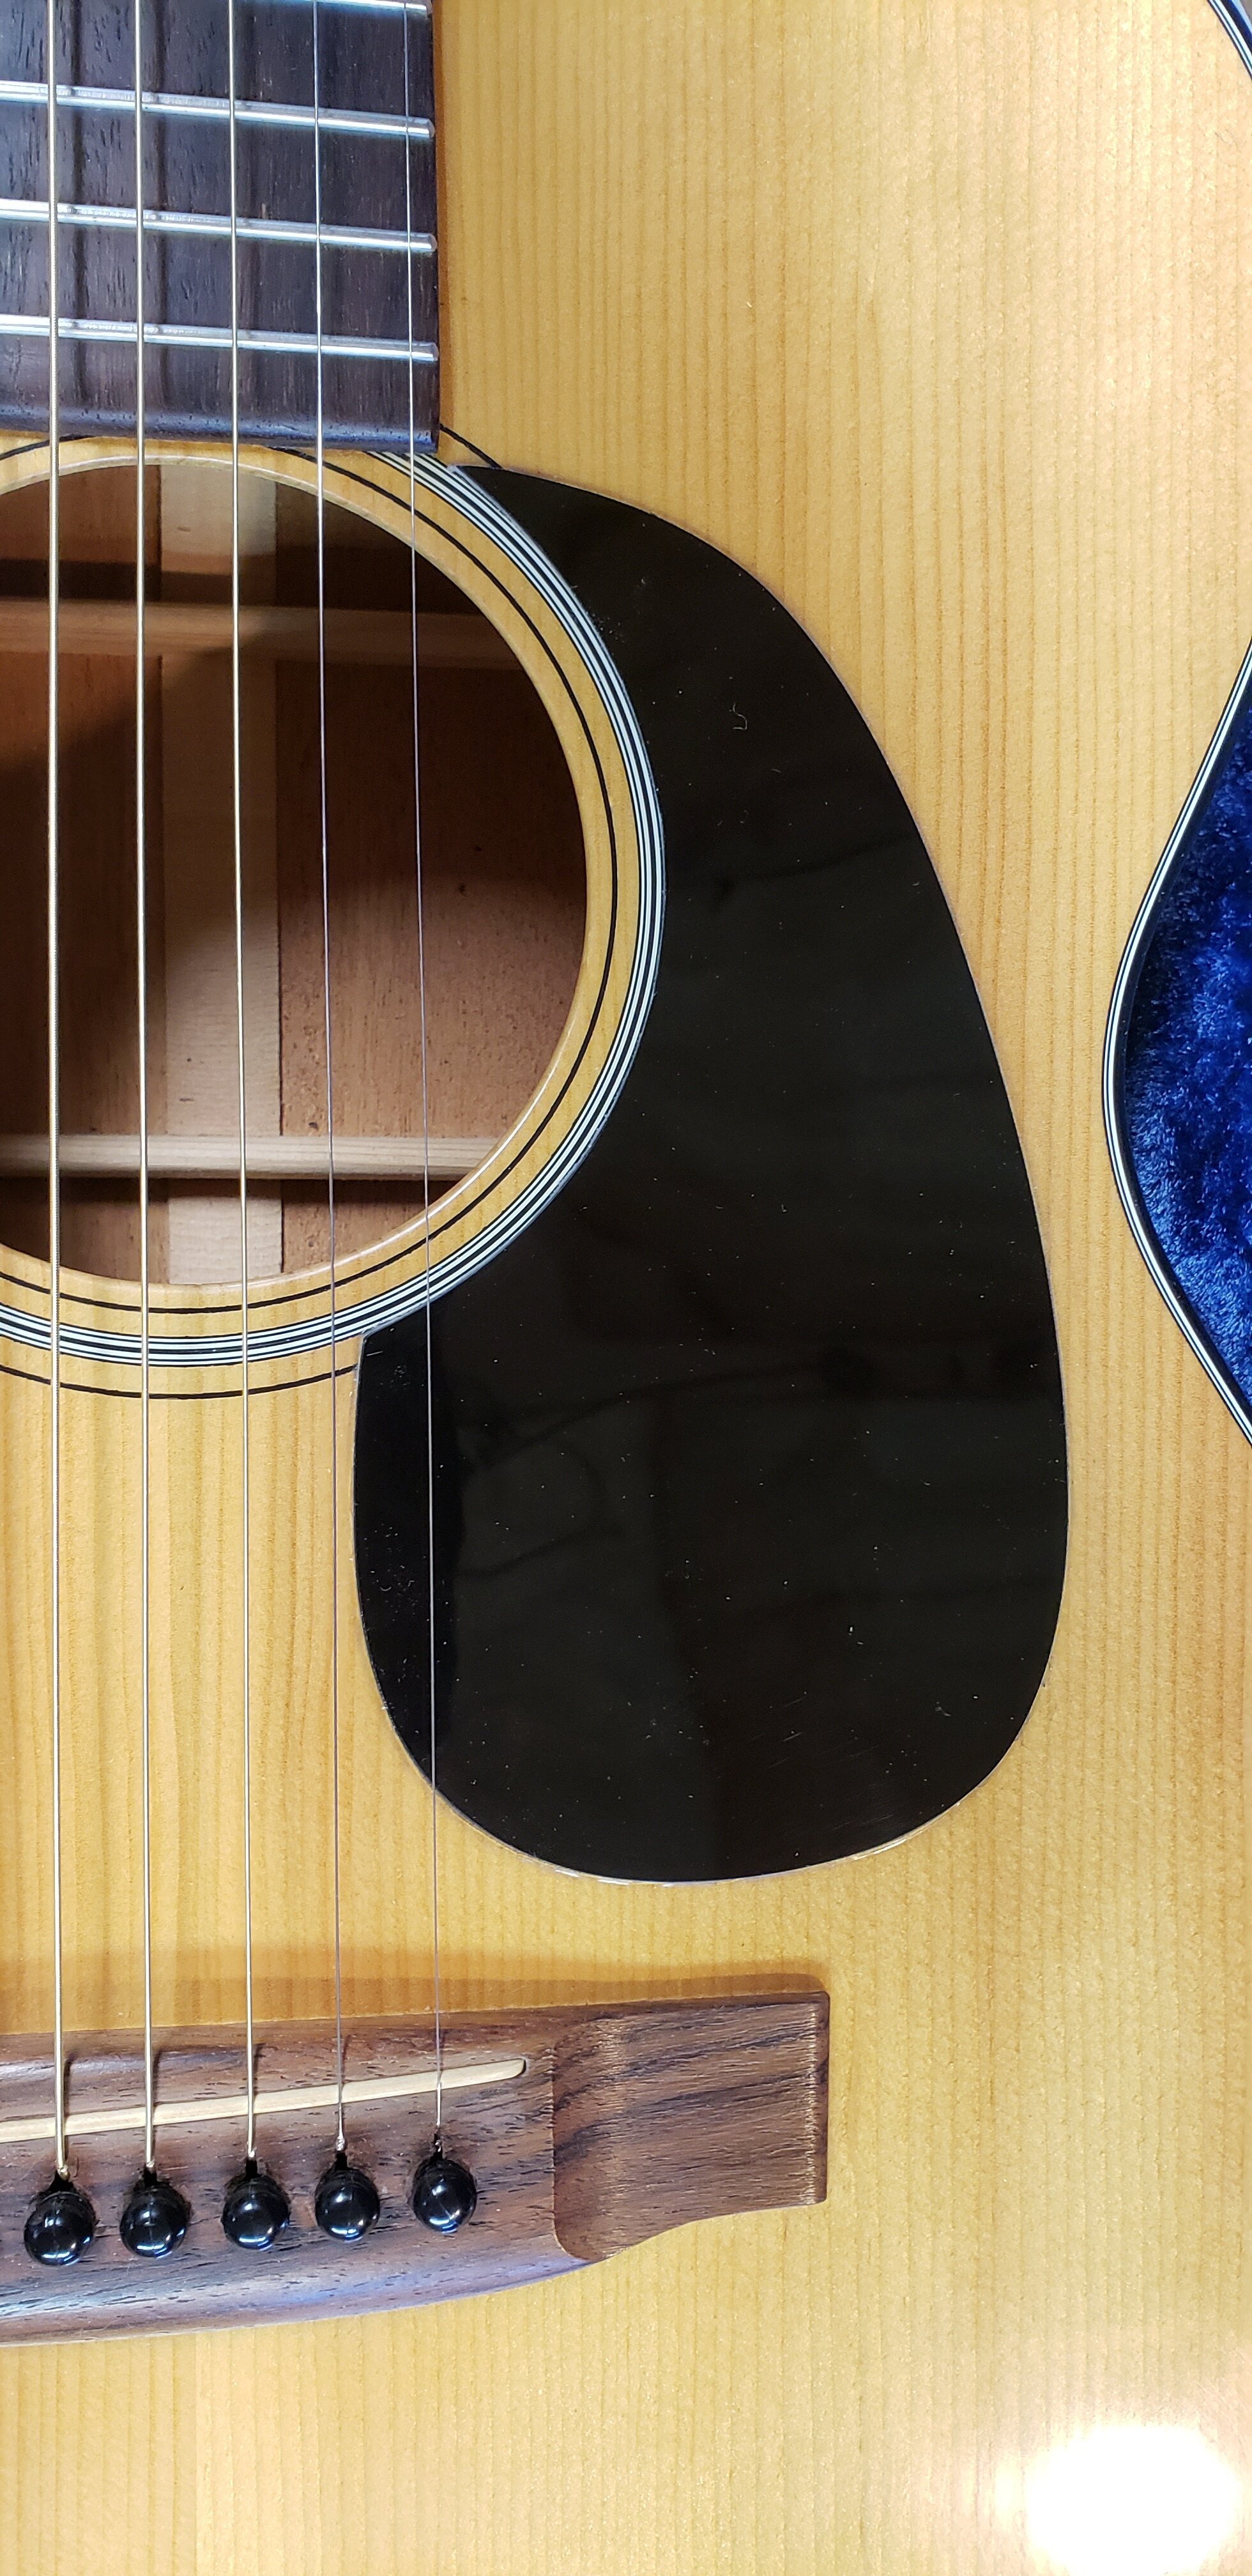
The bare wood was sealed with lacquer before the new guard was applied. The original finish rises like a well surrounding it perfectly, and the crack is no longer visible.
The back story to this guitar, is that it was sent to Joni Mitchell as a promo. For whatever reason, she didn’t accept, and returned it…..SO…
The Martin “mantra” of the era was that certified Martin dealers would set up the instrument to YOUR specs as part of the purchase. But these instruments did not have adjustable truss rods! ALL adjustments happen at the nut and bridge.
This guitar was a gift, and its owner didn’t know the policy, so it was never set up. I greatly improved the action by shaving the saddle, tuning the nut, and stringing the guitar with “10s”. Further improvement would require deepening the saddle slot and shaving the top of the bridge. This may be done later.
This guitar has power, balance, and tonal complexity that you don’t get very often. Joni missed her chance.
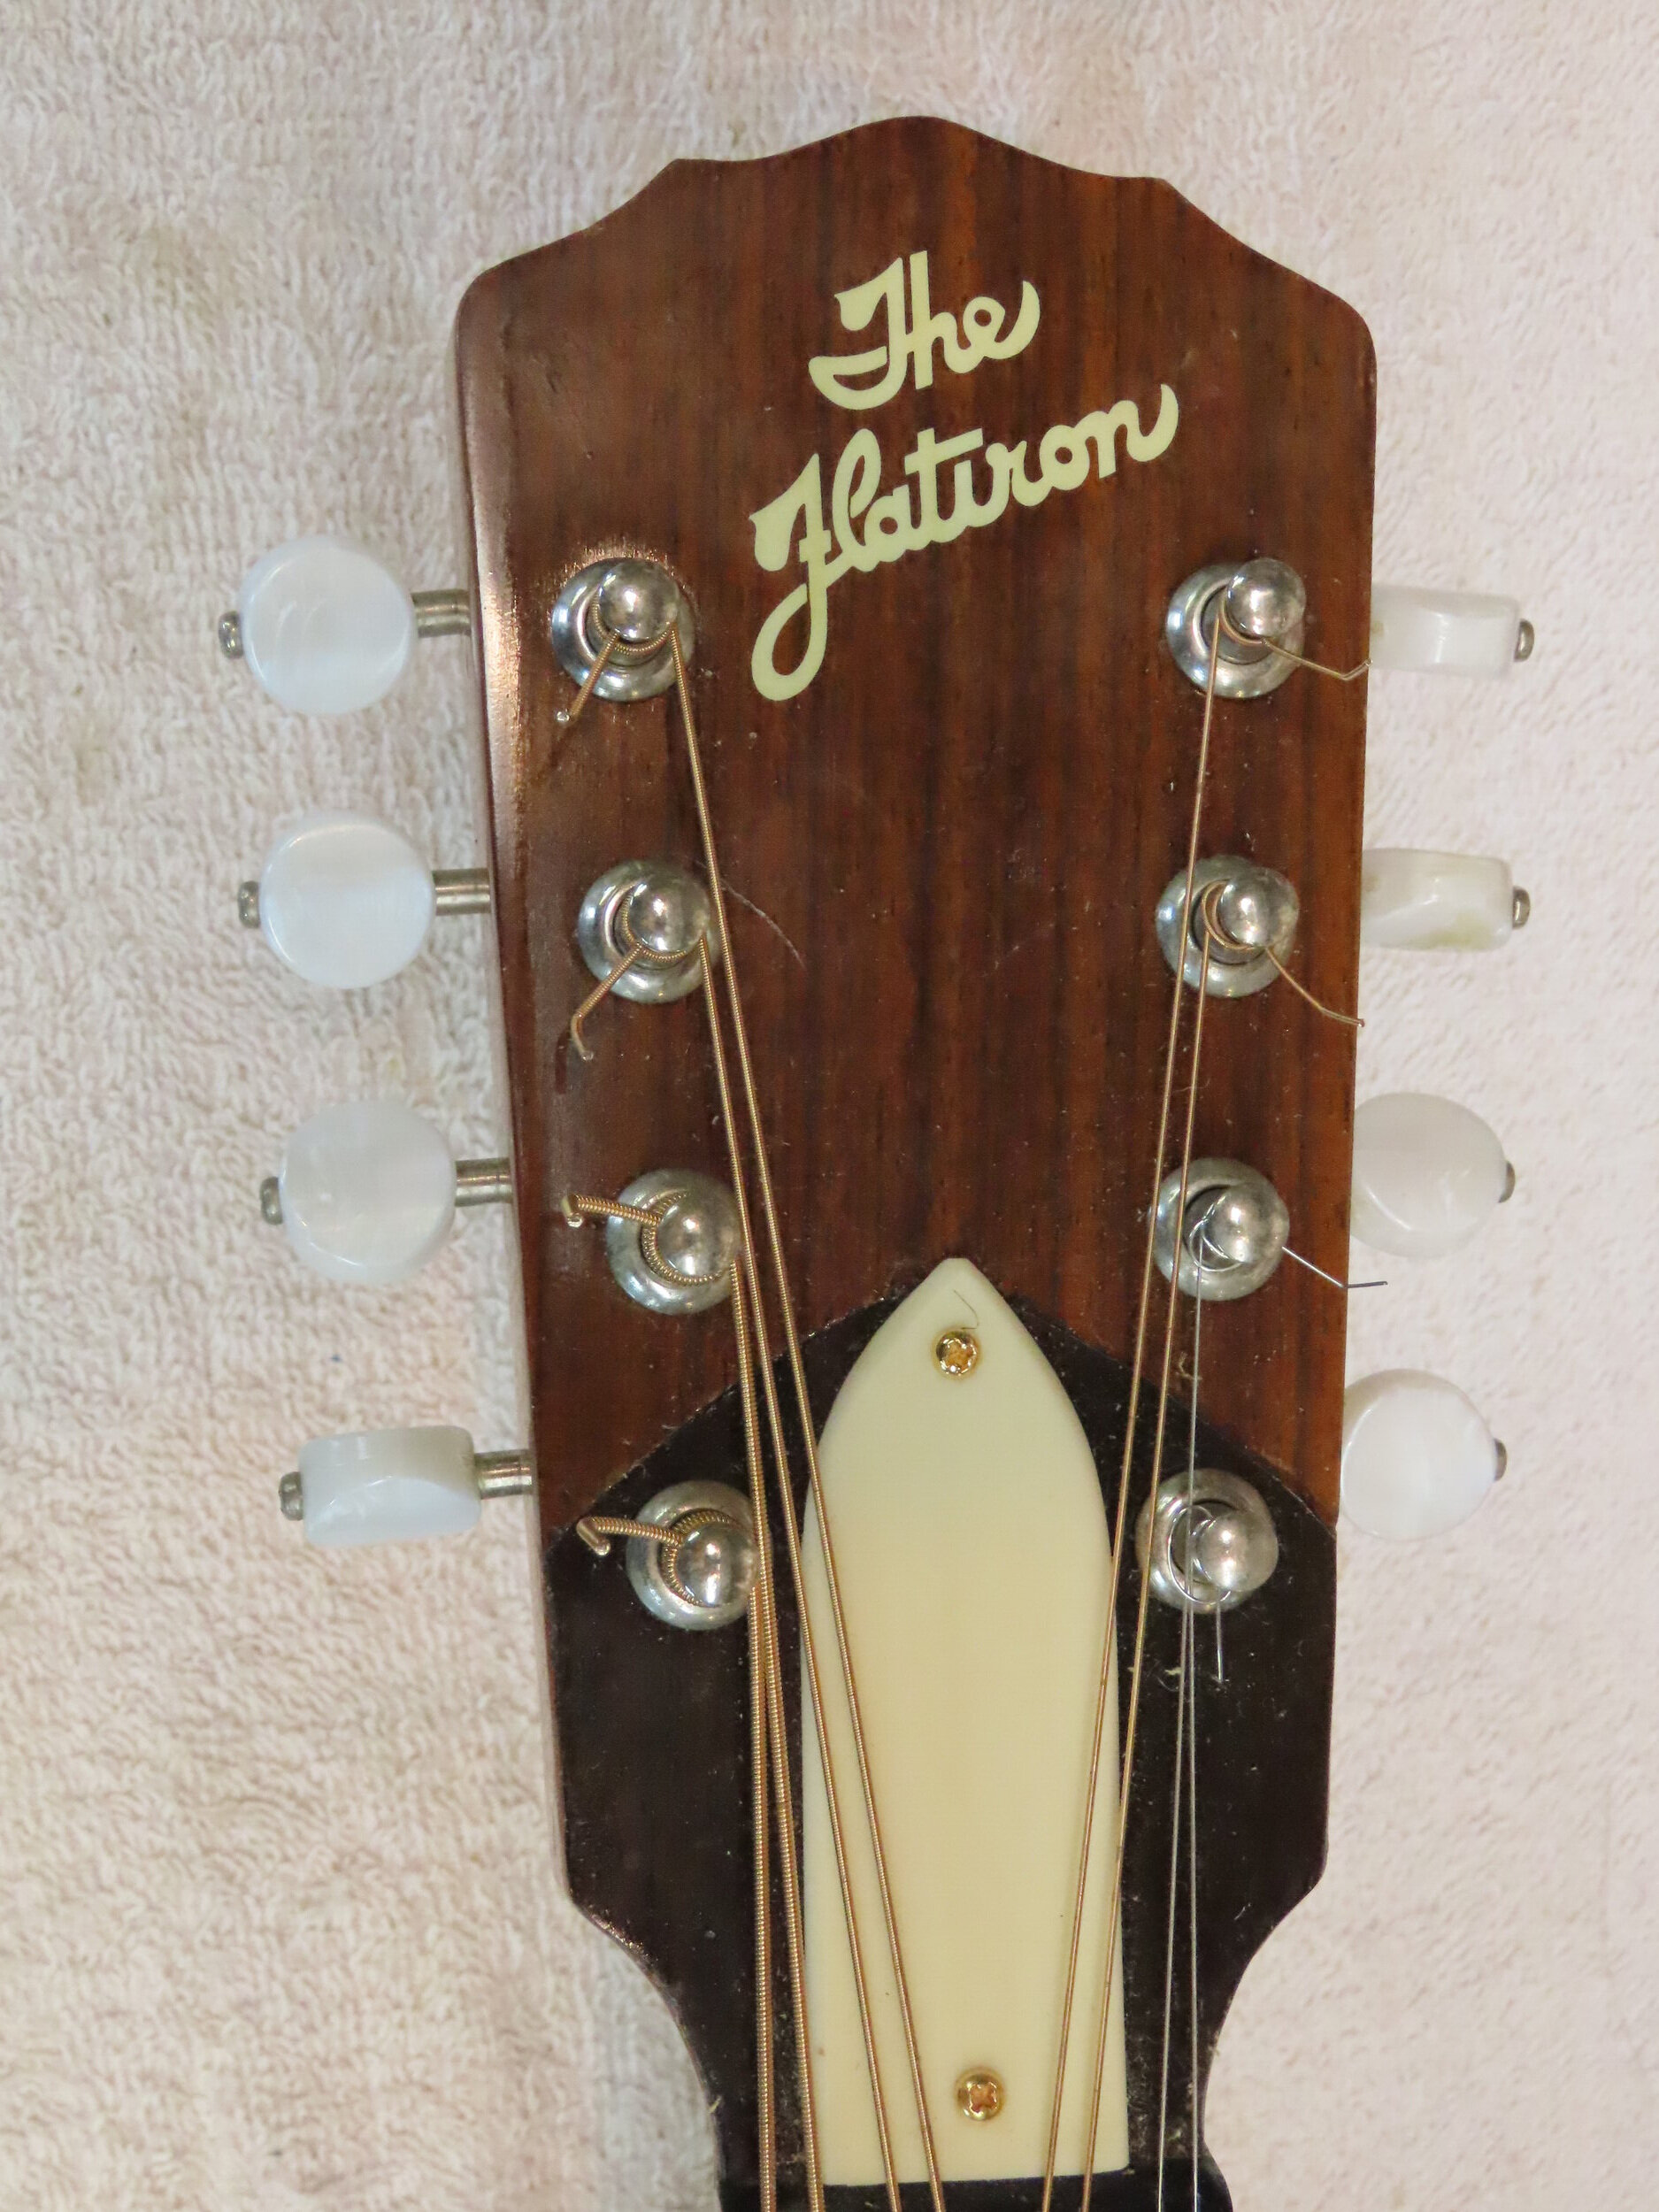
My friend Eric brought his mandotar to me (like an “A” style tenor mandolin with a guitar scale neck length) with a total headstock break. The GOOD news was that when the break occurred, the severed headstock had been put in the case with the instrument and no fussing or other repair attempts had ben made. The BAD news was that there were some serious chip fragments lost forever from the face of the headstock near the truss rod and first tuning pegs. I was able to “knit”, align, and re-glue the headstock to the neck, but the face was too scarred to leave as it was.
With Eric’s permission, I shaved the face down to solid wood and inlaid an ebony piece that covered the face damage and echoed the truss rod cover. The next slide shows the back side of the repair, but the end result is a unique instrument that can be played again with confidence.
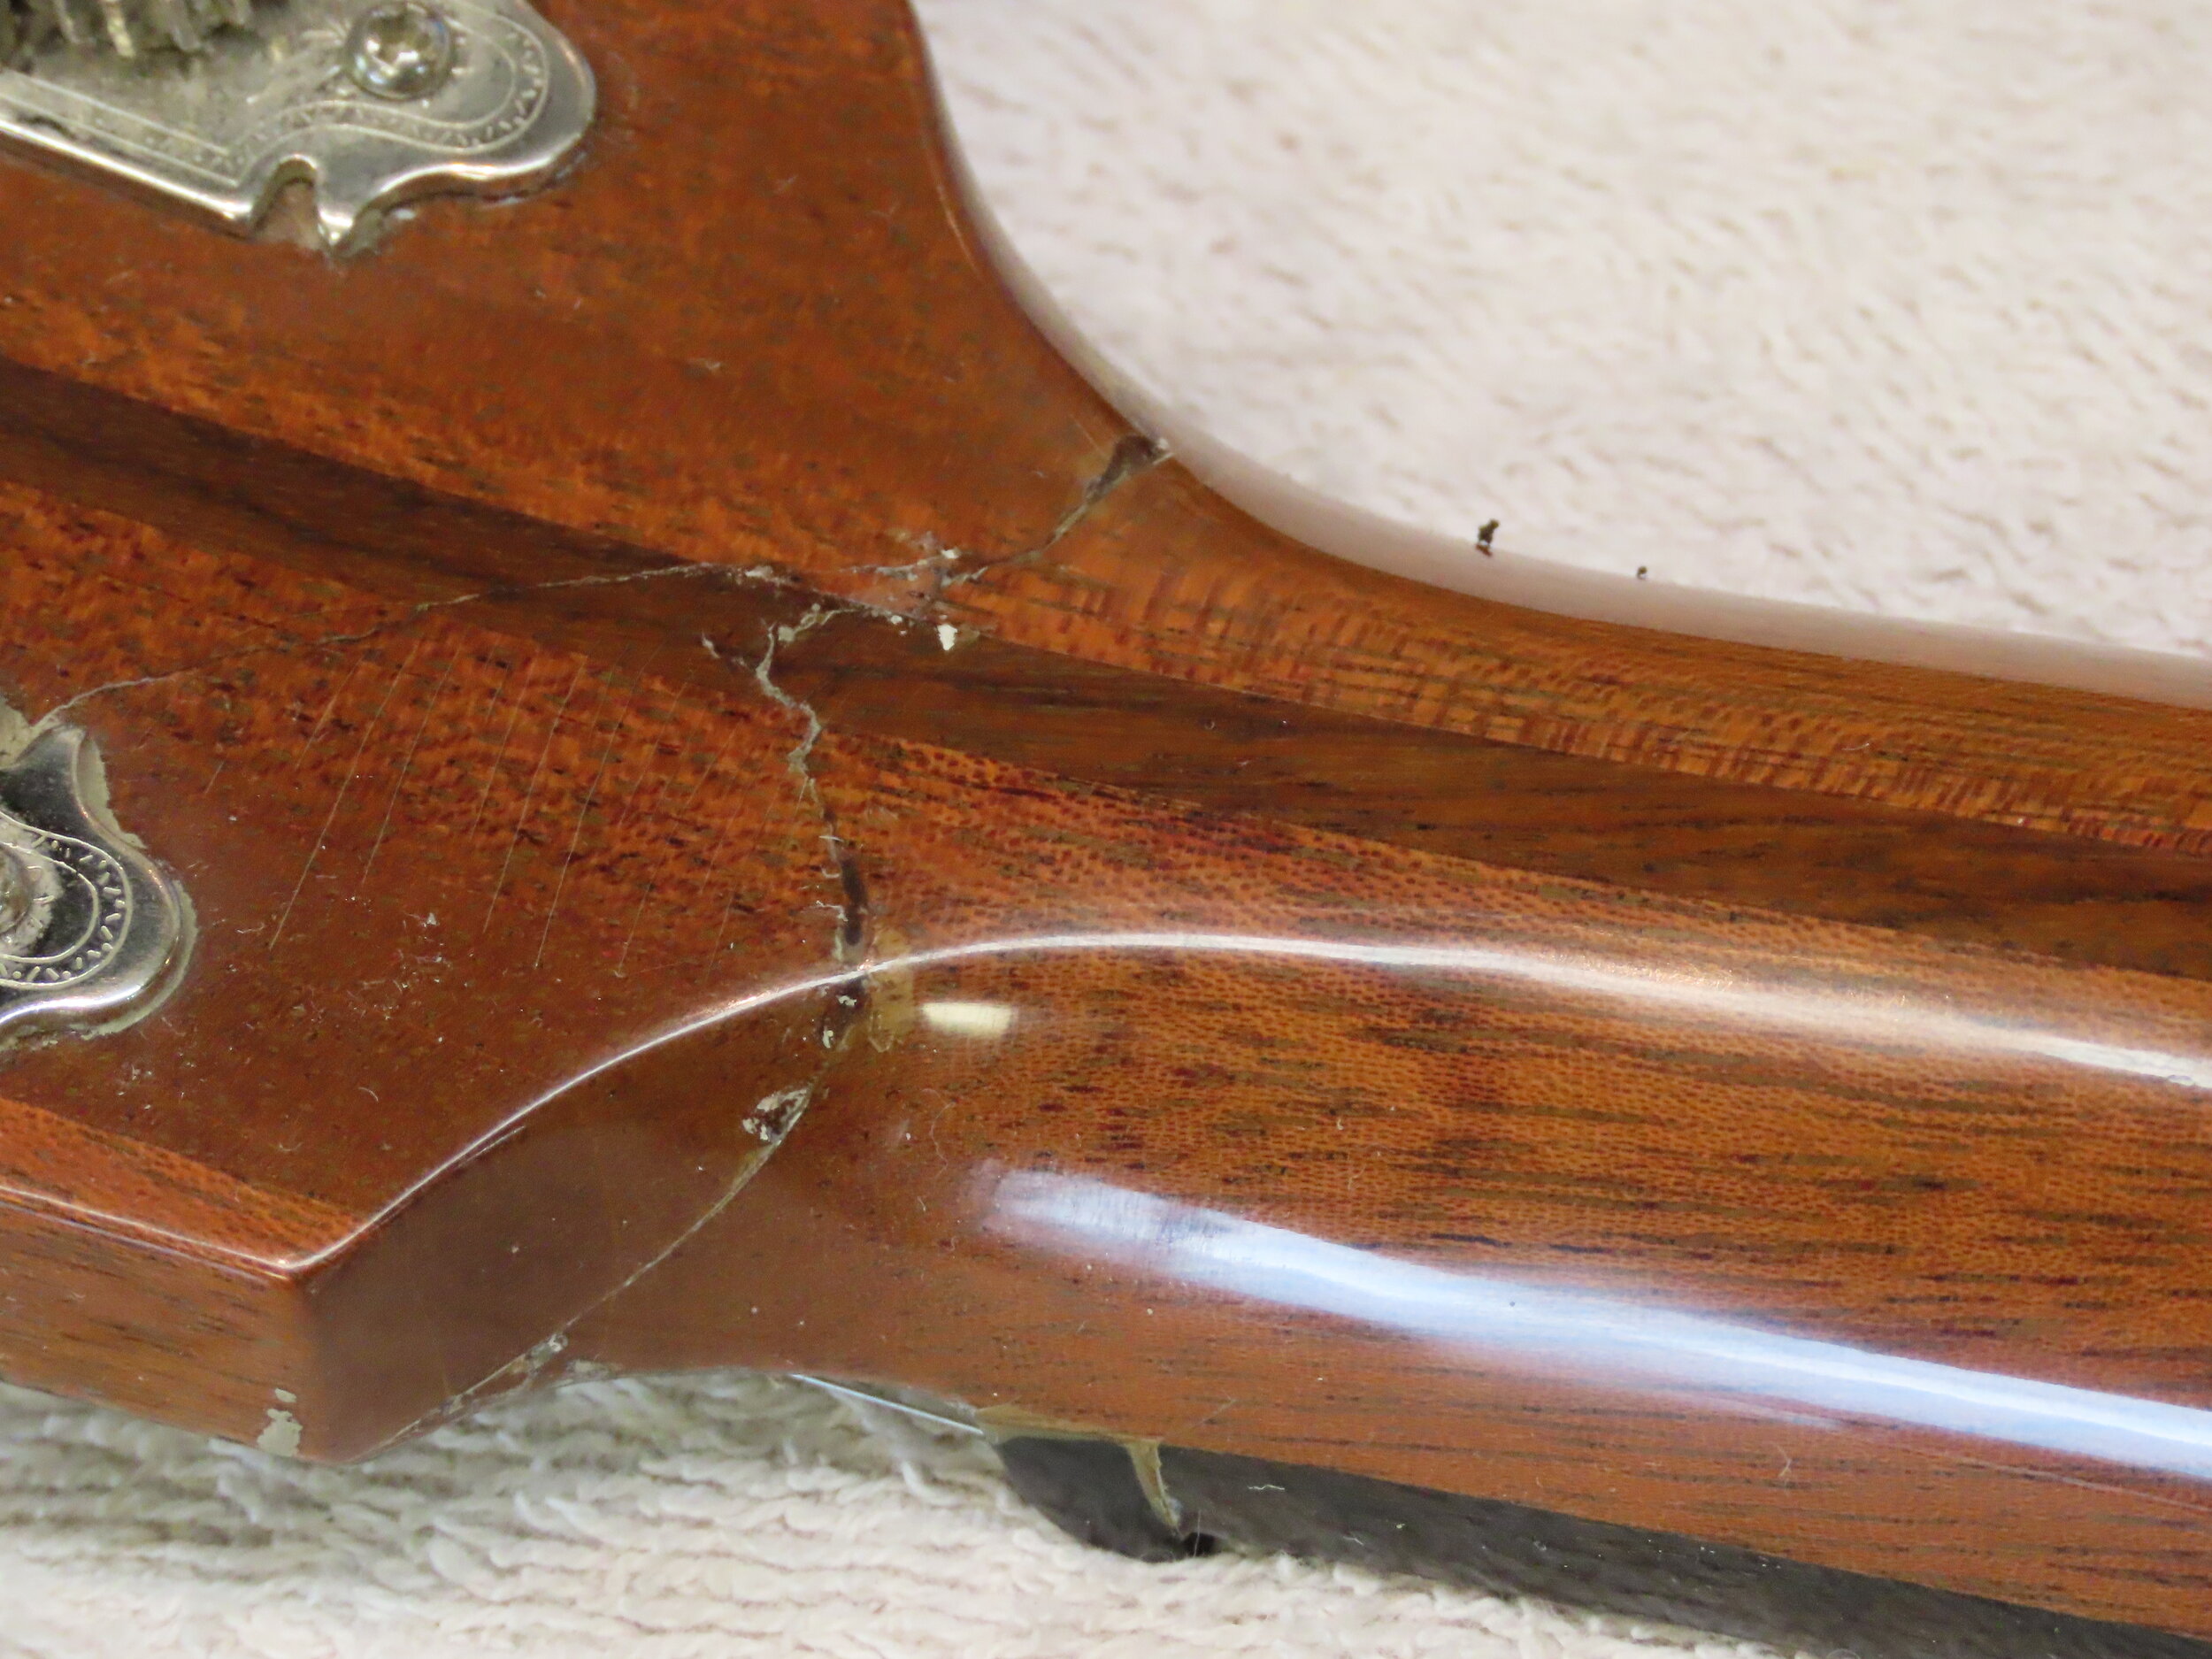
A cross grain break will never be invisible, so the next best thing to do is make it “invisible” to the player’s hand. This shows the back side of Eric’s Flatiron Mandotar neck repair, filled, faired, and polished. Famed instrument repairman, Dan Erlewine, refers to these repairs as the “smile” cracks because they are almost always one or two arcs across the grain
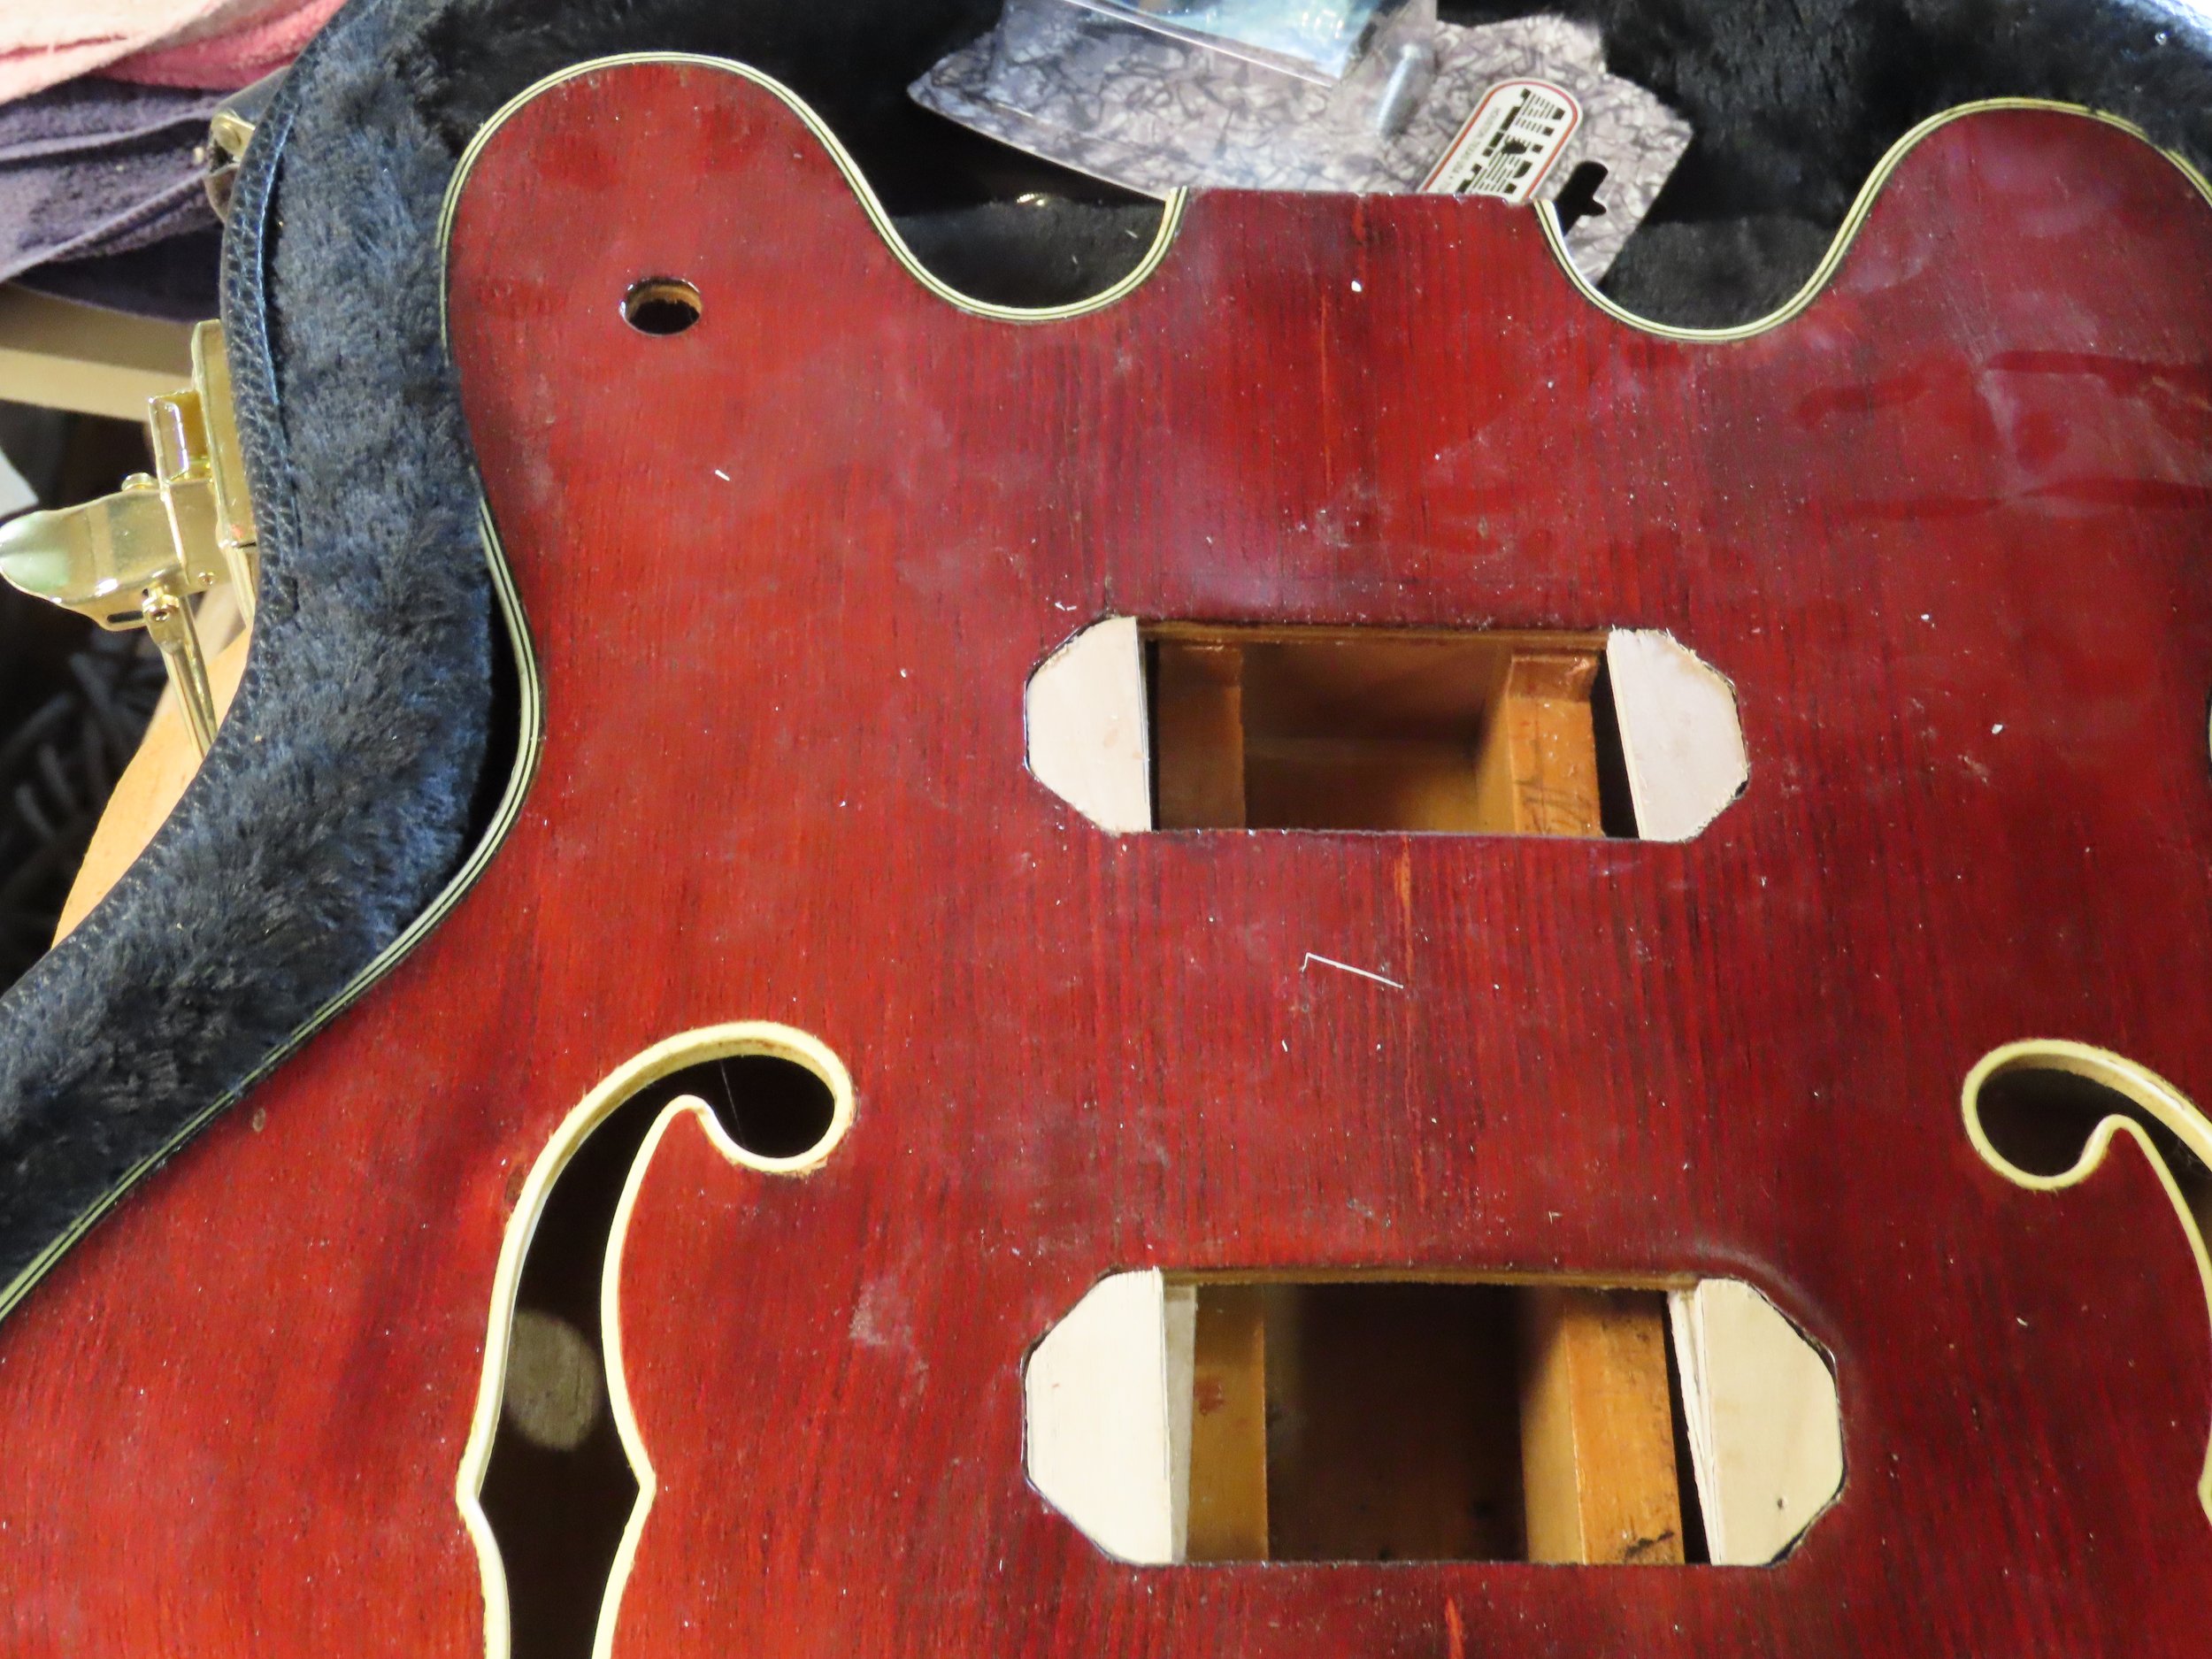
This is a story about friends. A customer brought me this body which he found as he cleared his closets preparing to move. It had been given to him by his lifelong friend so far in the past that neither remembered it. It was finished,bound, pre-drilled, and routed for its electronics, but no neck pocket had been cut, and the finish had checked badly. He asked if we could complete it so that he could give it back to his friend for Christmas. There were no labels, ink, numbers or clues to its origin, but I dug in and started. This photo shows my first steps to reshape the pickup routs to fit existing units, since no available pickups fit the spaces. I had also begun to wet sand and re-amalgamate the finish. Over time, I used a partially finished neck, Lace jazz fusion pickups, best guess bridge and tailpiece components and completed the guitar as seen in the next photo.
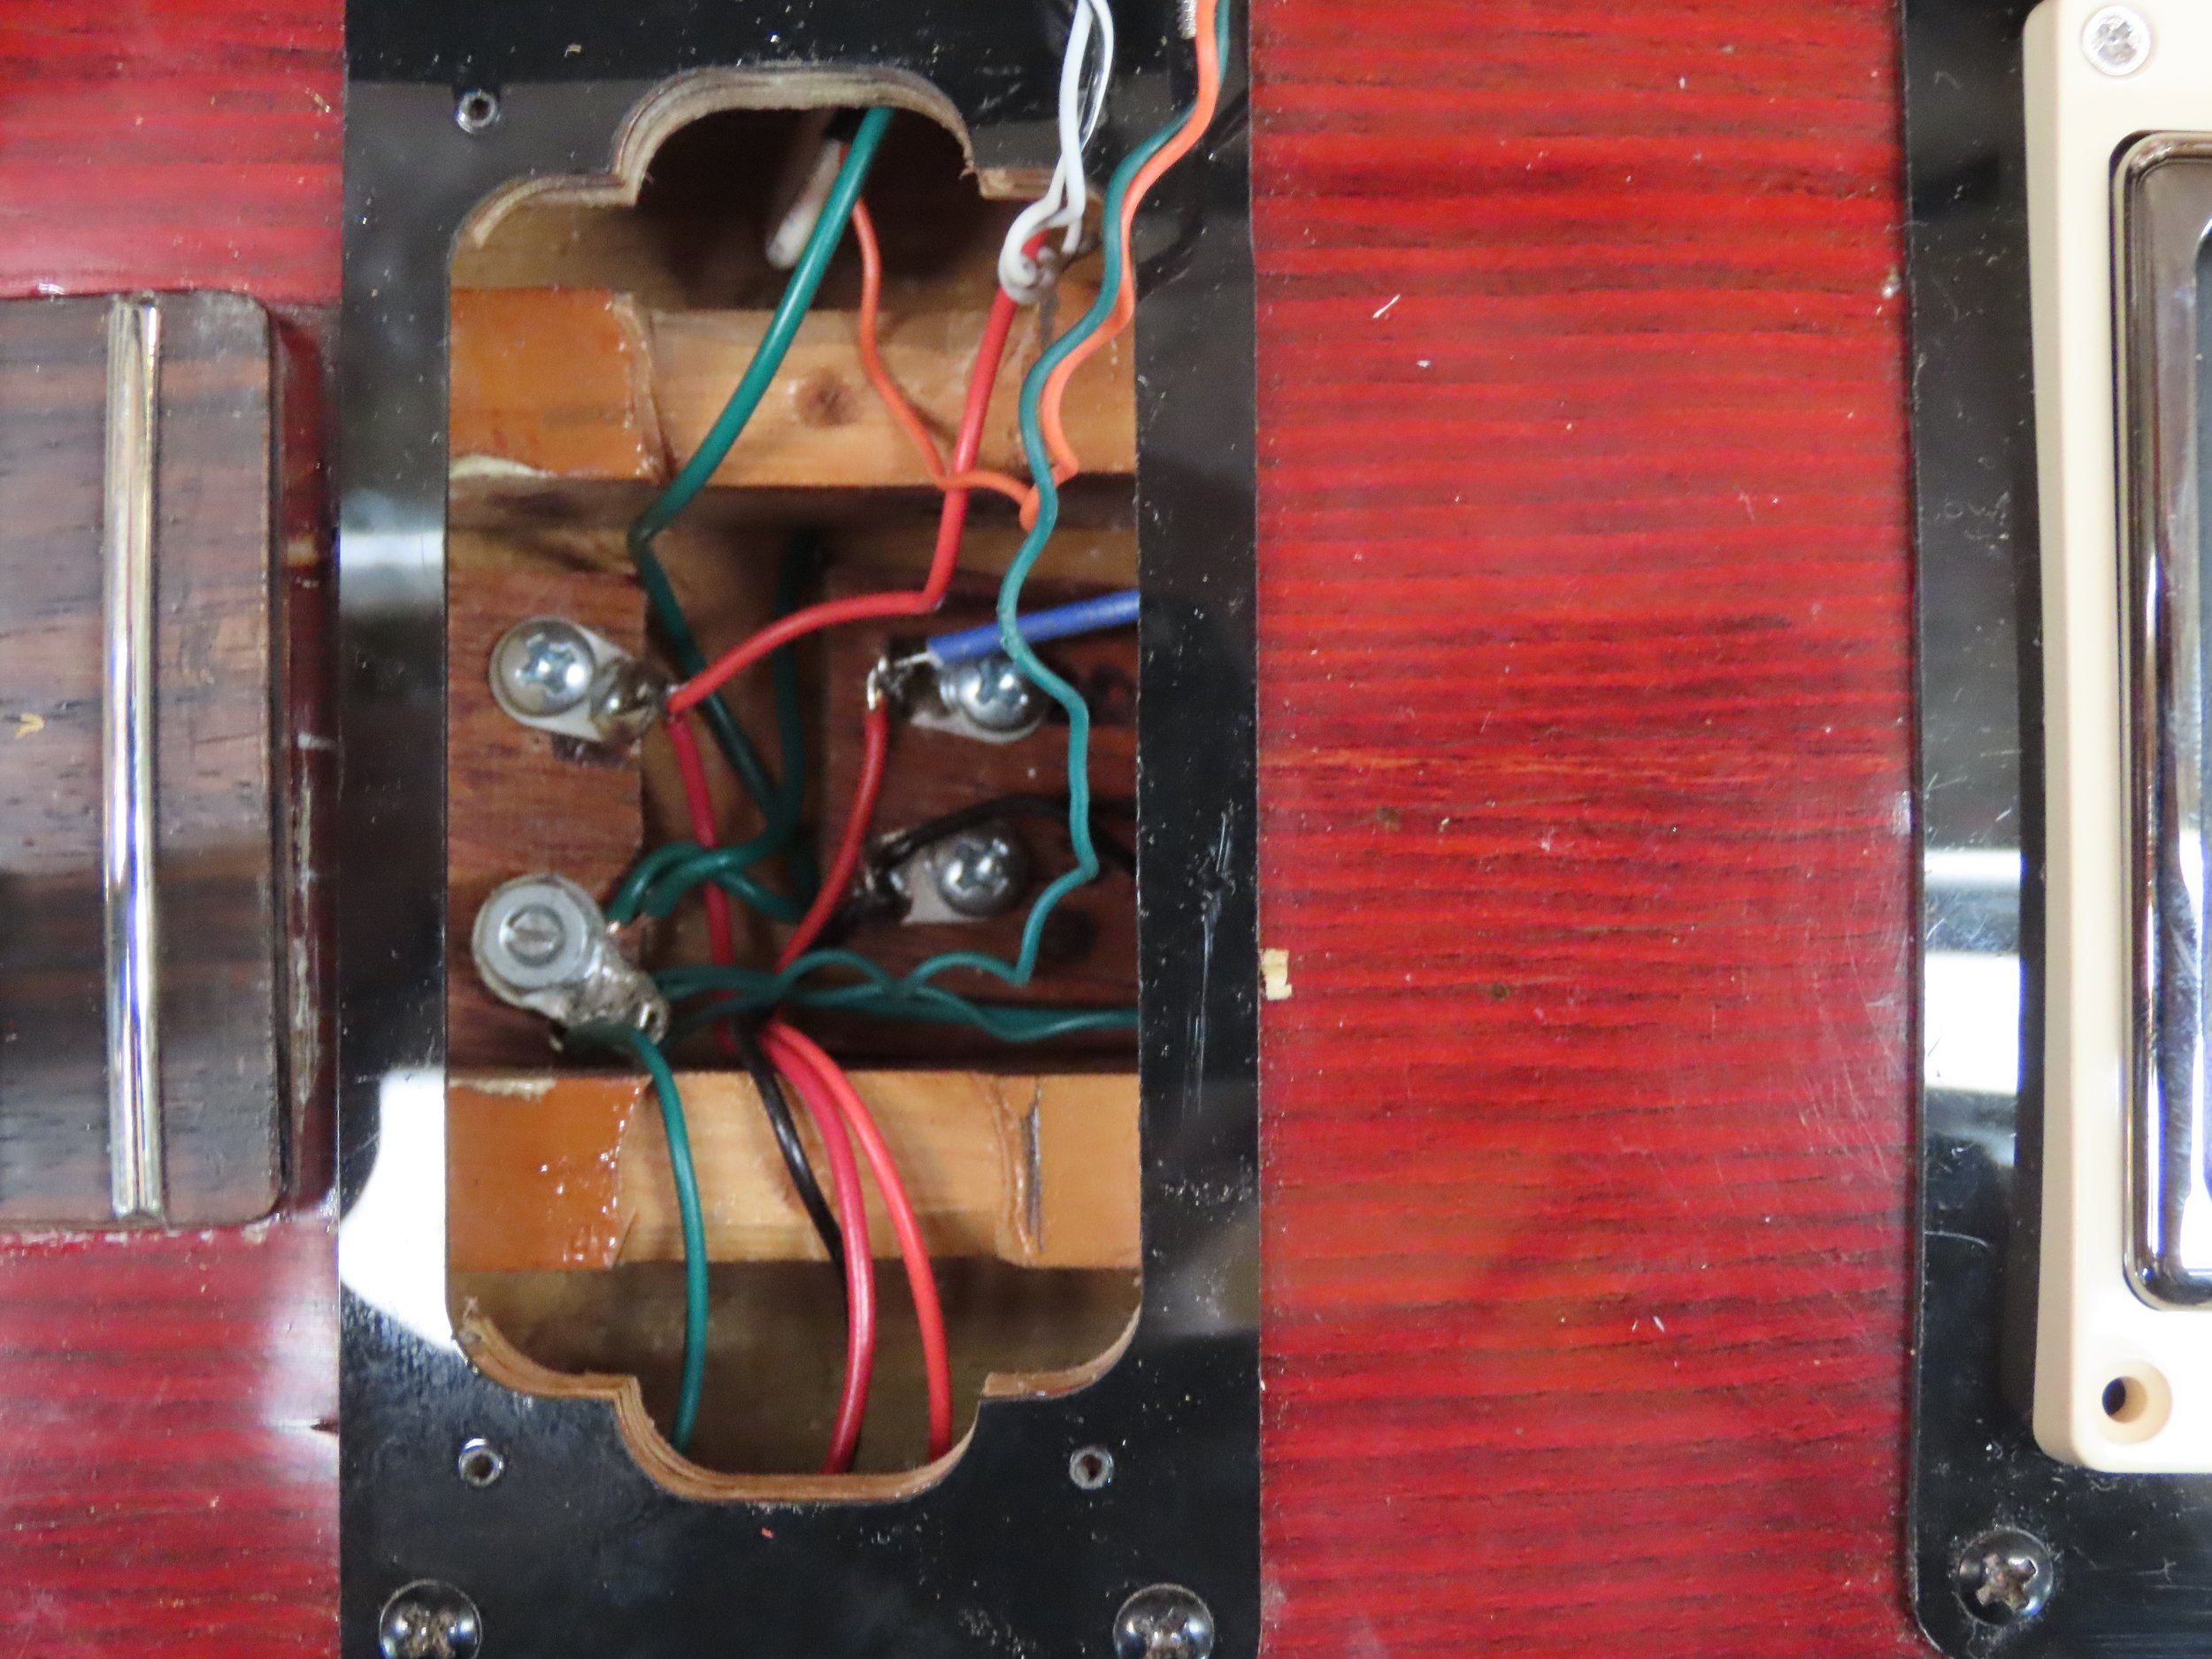
The double rib spine construction of the body made the prospect of wiring the Lace jazz fusion pickups with coil tapping a formidable challenge. You can see how I had masked the fills to the pickup routs with pickguard material and routed for humbuckers. to eliminate the need for feeding an excessive number of wires through impossible space, I attached 4 chassis ground lugs to the bottom of the guitar under the neck pickup. It was still very tight work, but it made the job possible. The finish is nearly finish sanded and ready for a dress coat of lacquer.
This was the finished guitar. I had gotten a case that fit, so the package was complete. The finish is attractive though showing some pedigree compliant with a 50 year old instrument that’s been around the block.
As it turns out, I was actually able to find who had originally made the body in or around 1970. It was going to be an Ovation Tornado. The parts I’d used to restore the body were very much in line with the components Ovation had used in this line although I think I upgraded the bridge, tuners and pickups. Even the new lace pickups resemble the original Ovation units. The original instrument, if completed, would have been priced roughly equivalent to a Gibson SG.